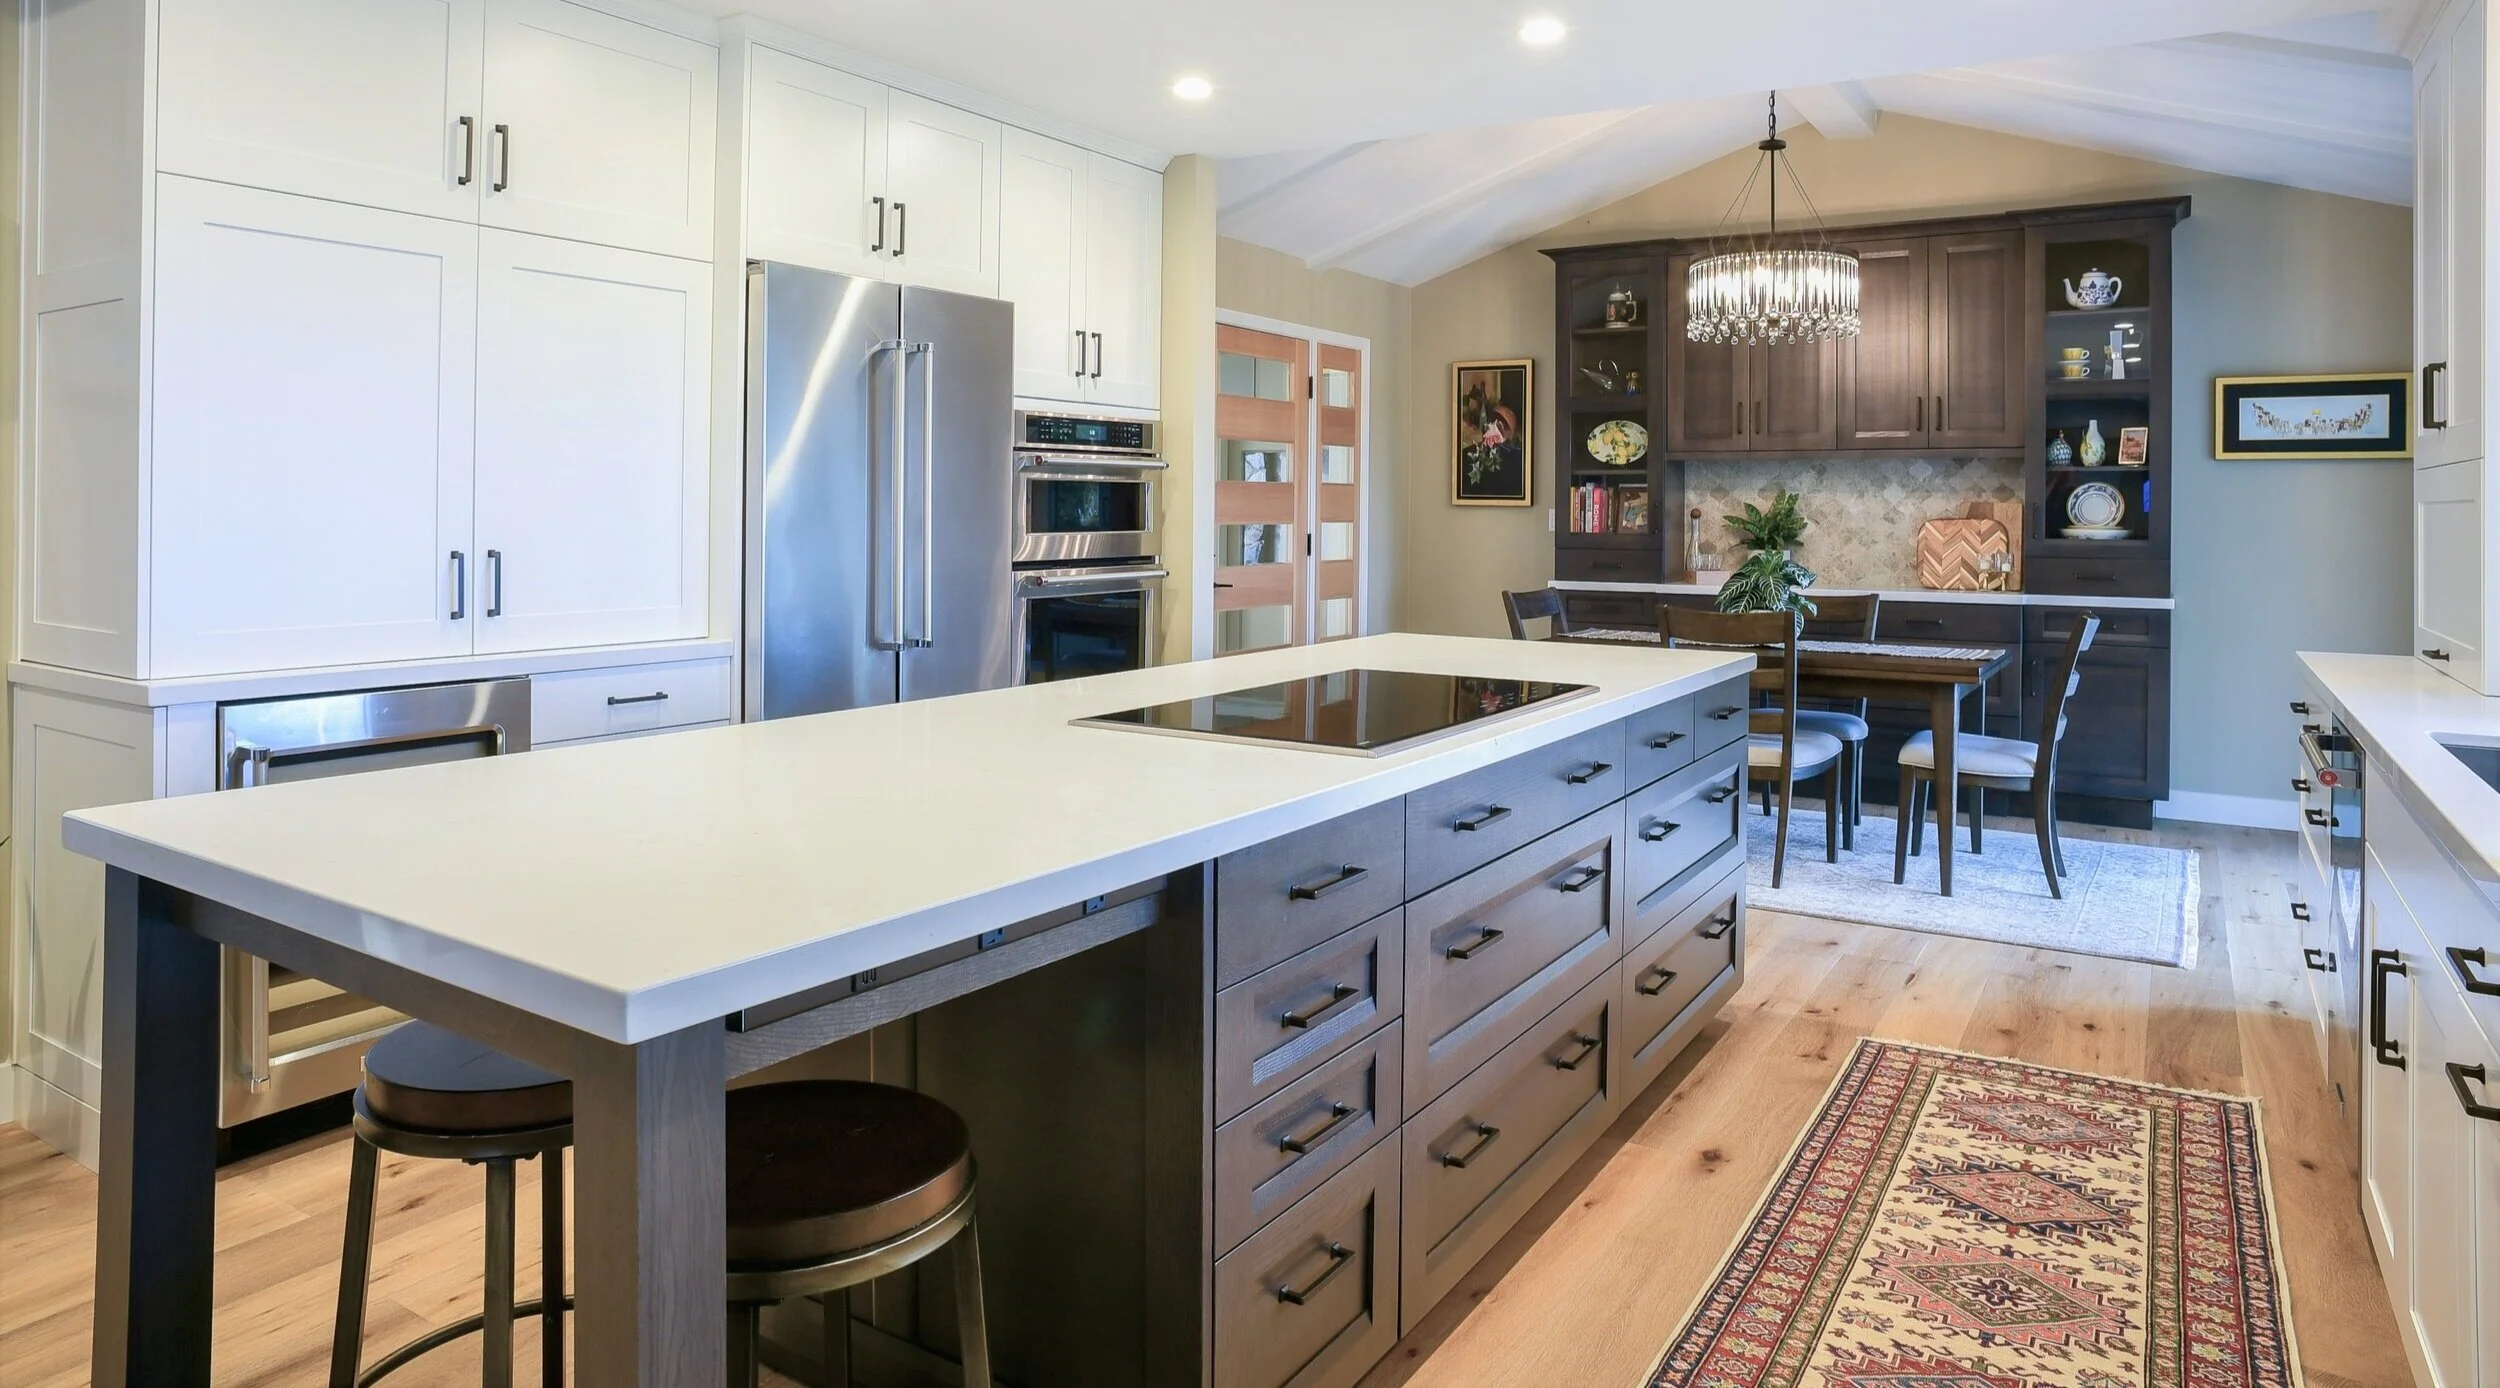
Top 5 Recommendations for Your Luxury Kitchen

I was recently asked by Sacramento Interior Designer Rebecca Ward to identify the top 5 kitchen elements that every client beginning a kitchen remodel should be sure to consider when planning their renovation. My brain went into overdrive going through all the options and decisions that homeowners have to make during a kitchen remodel. Kitchens are such an integral part of how a family functions and is one of the most used rooms in the home so the opportunities for making that space function as fully as possible for each client has to be considered on a case by case basis.

Since every client will have different priorities from wine storage to a coffee center and from high performance appliances to a space that is kid friendly, I chose to focus on elements that are universal to ALL clients. These are my top 5 recommendations that will be valuable to anyone planning an upgrade to their kitchen.

#1- All of us have stood at the kitchen sink with our hand under the flow of water as we wait for it to heat up. Whether we’re filling a pot to boil, making a kettle of tea or soaking a 9x13 pan that has stuck on food… we need HOT water. If you’re like me you’ve also jumped head first into the carbonated water craze. I can’t get enough of it. 2 years ago I even purchased a Soda Stream just so I could make carbonated water and not have to buy disposable cans. My husband, on the other hand, prefers still water but the water from the tap isn’t cold enough and the water from the refrigerator takes FOREVER to fill a glass. The solution is Zip Water. This faucet is connected to a cube that goes under your sink and provides immediate, purified boiling, chilled and carbonated water from 1 single faucet. This is the perfect addition to any kitchen as it will reduce water waste as well as the environmental impact of bottled water and cans of carbonated water. It’s a must have for any new kitchen.

ZipWater Purcell Murray

ZipWater Purcell Murray

#2 - When it comes to cooking the majority of clients say that the cooktop is their most used appliance. Since this appliance does some pretty heavy lifting, it’s vital to have one that functions as safely and consistently as possible. For the first decade of my career as a kitchen designer the go-to cooktop was gas. People were tired of the hassles of an electric cooktop and gas was what all the high end kitchens were expecting. Over the last 10 years we’ve seen a huge swing towards induction technology. Learn more about induction cooktops in this designer appliance link. We’re seeing more professional chefs and commercial kitchens transitioning to induction because the quality of cooking control is better on induction than it is on gas. Looking towards the future, there is a planned reduction and eventual elimination of all gas in residential construction so you’ll be ahead of the curve.

Bosch Induction appliancebuyersguide.com

Bosch Induction appliancebuyersguide.com

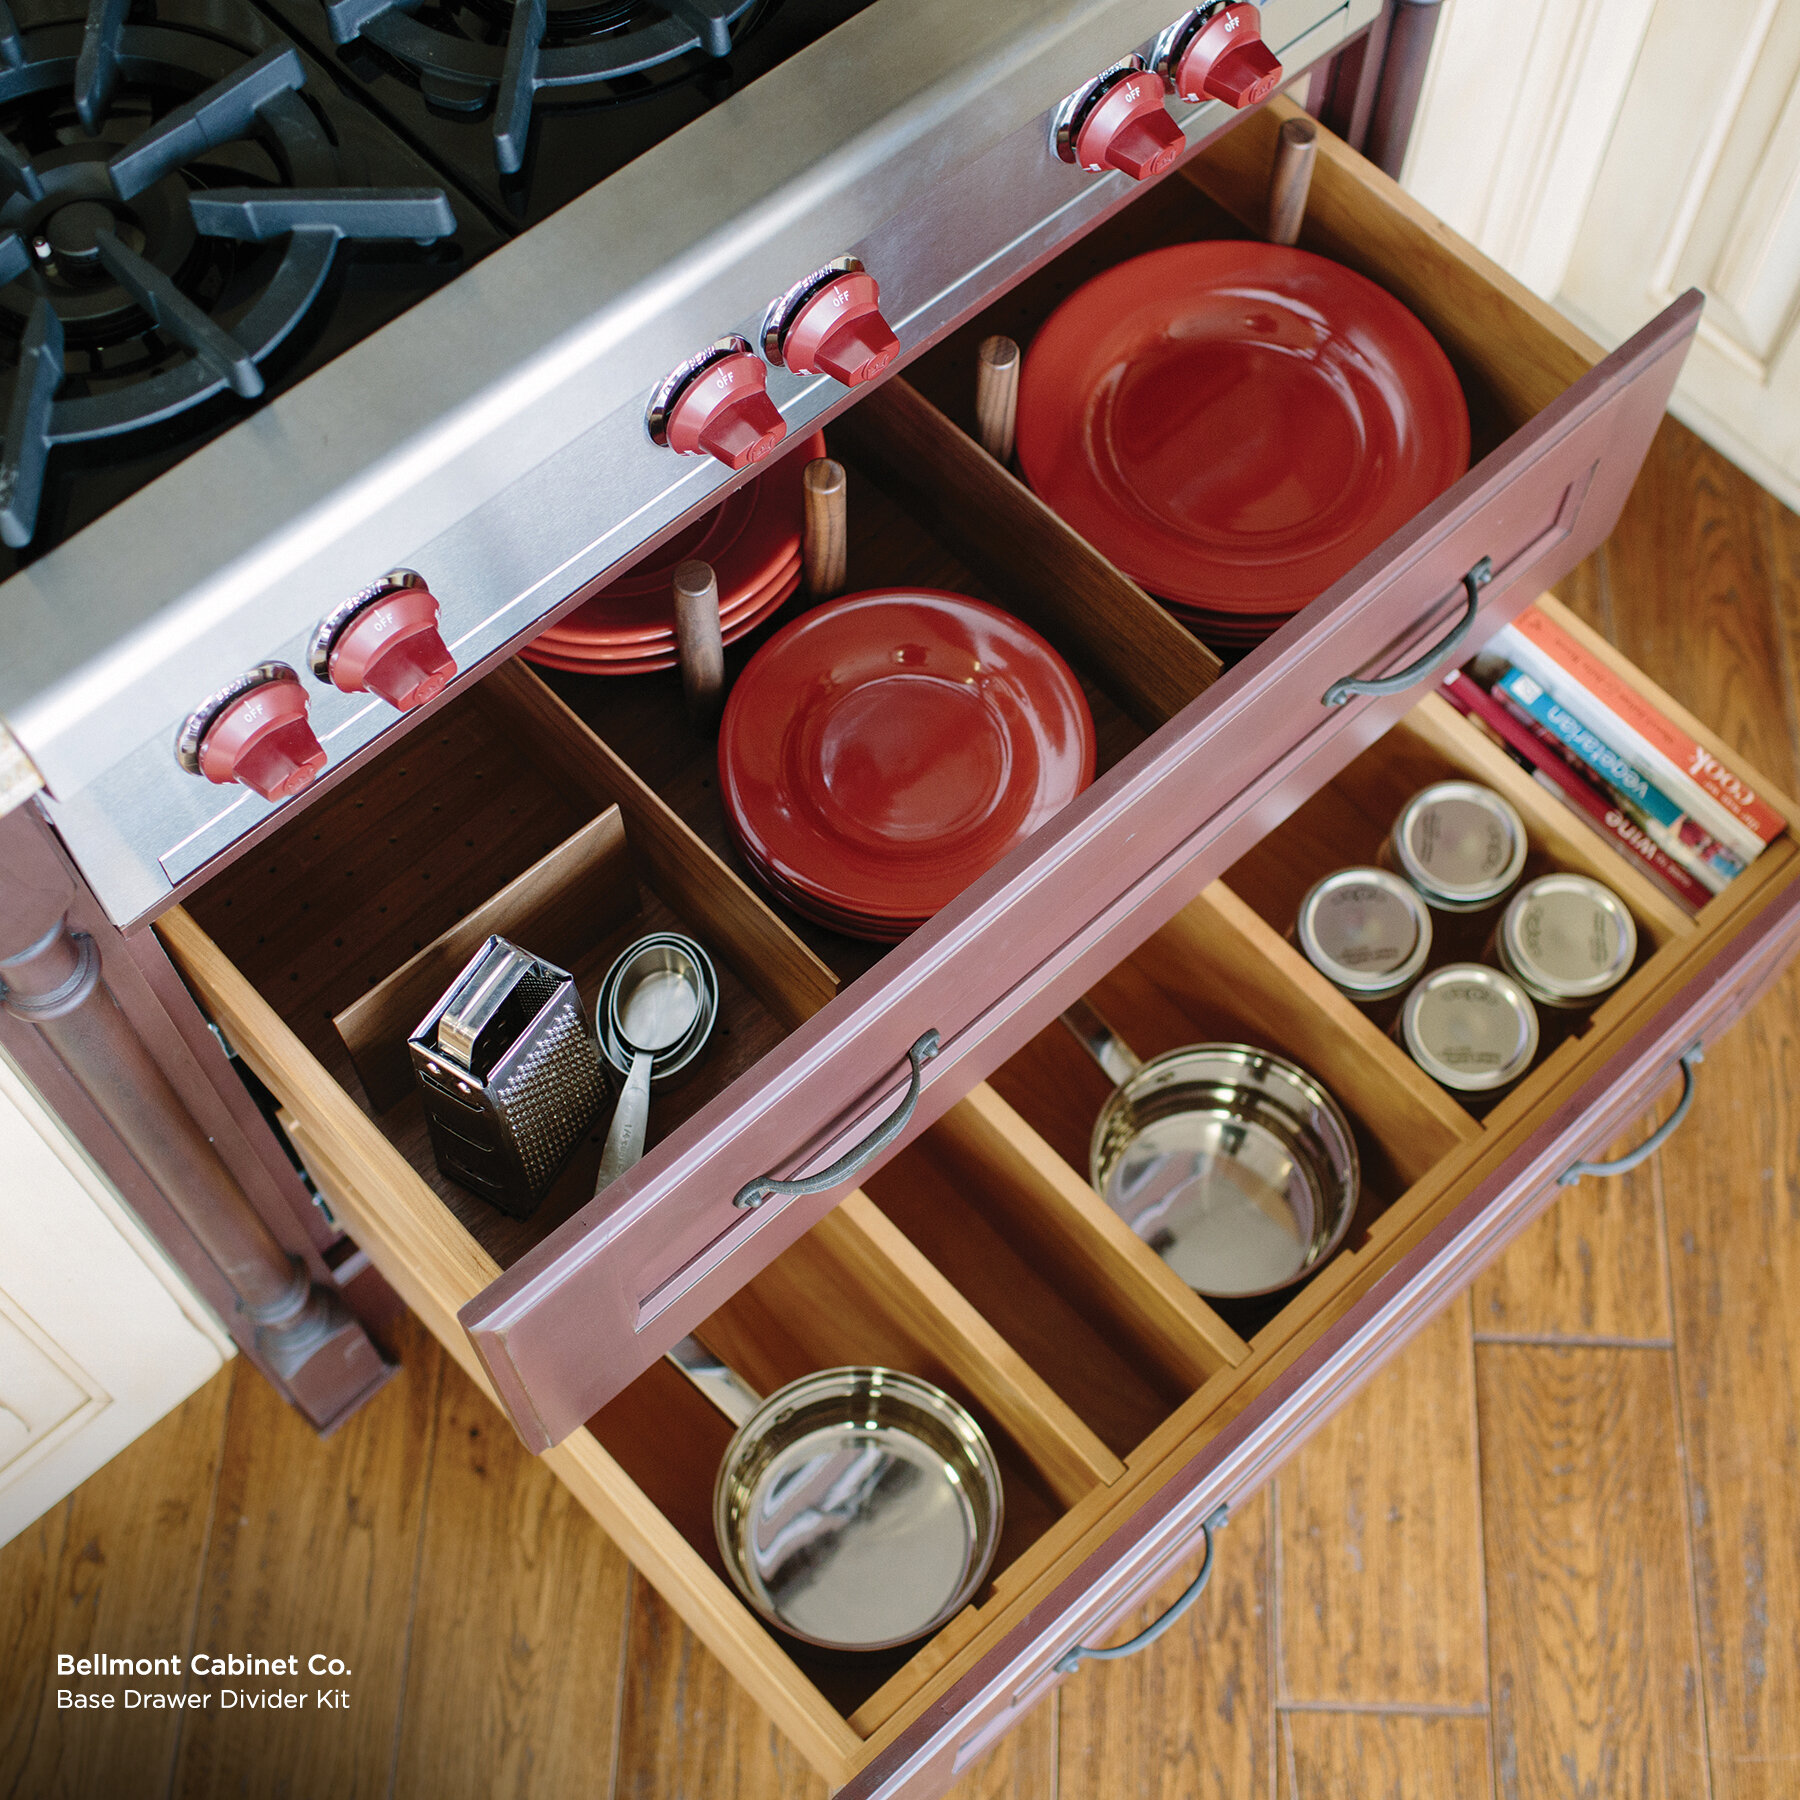
#3 - I’m a cabinet nerd. I totally geek out on all things cabinet related so here’s one of the simplest design decisions that will improve the experience of cooking in your kitchen. Use full extension, high load capacity (55 lb or more) drawers everywhere. If your cabinets are mostly drawers you will have better access to your base storage. Rather than crouching down and having to pull out the items in the front in order to get to the long lost items that have been shoved in the back, it’s so much nicer to be able to pull open a drawer and see everything neatly organized and easily accessible. Good Housekeeping had some great tips on making the most of your Drawer Storage in this article last January. Just be sure to make certain you have a spot to store any tall stock pots or small appliances. Sometimes you can also store items on their side if they’re too tall to remain upright in the drawers.


Bellmont Drawer Dividers

Bellmont Drawer Dividers

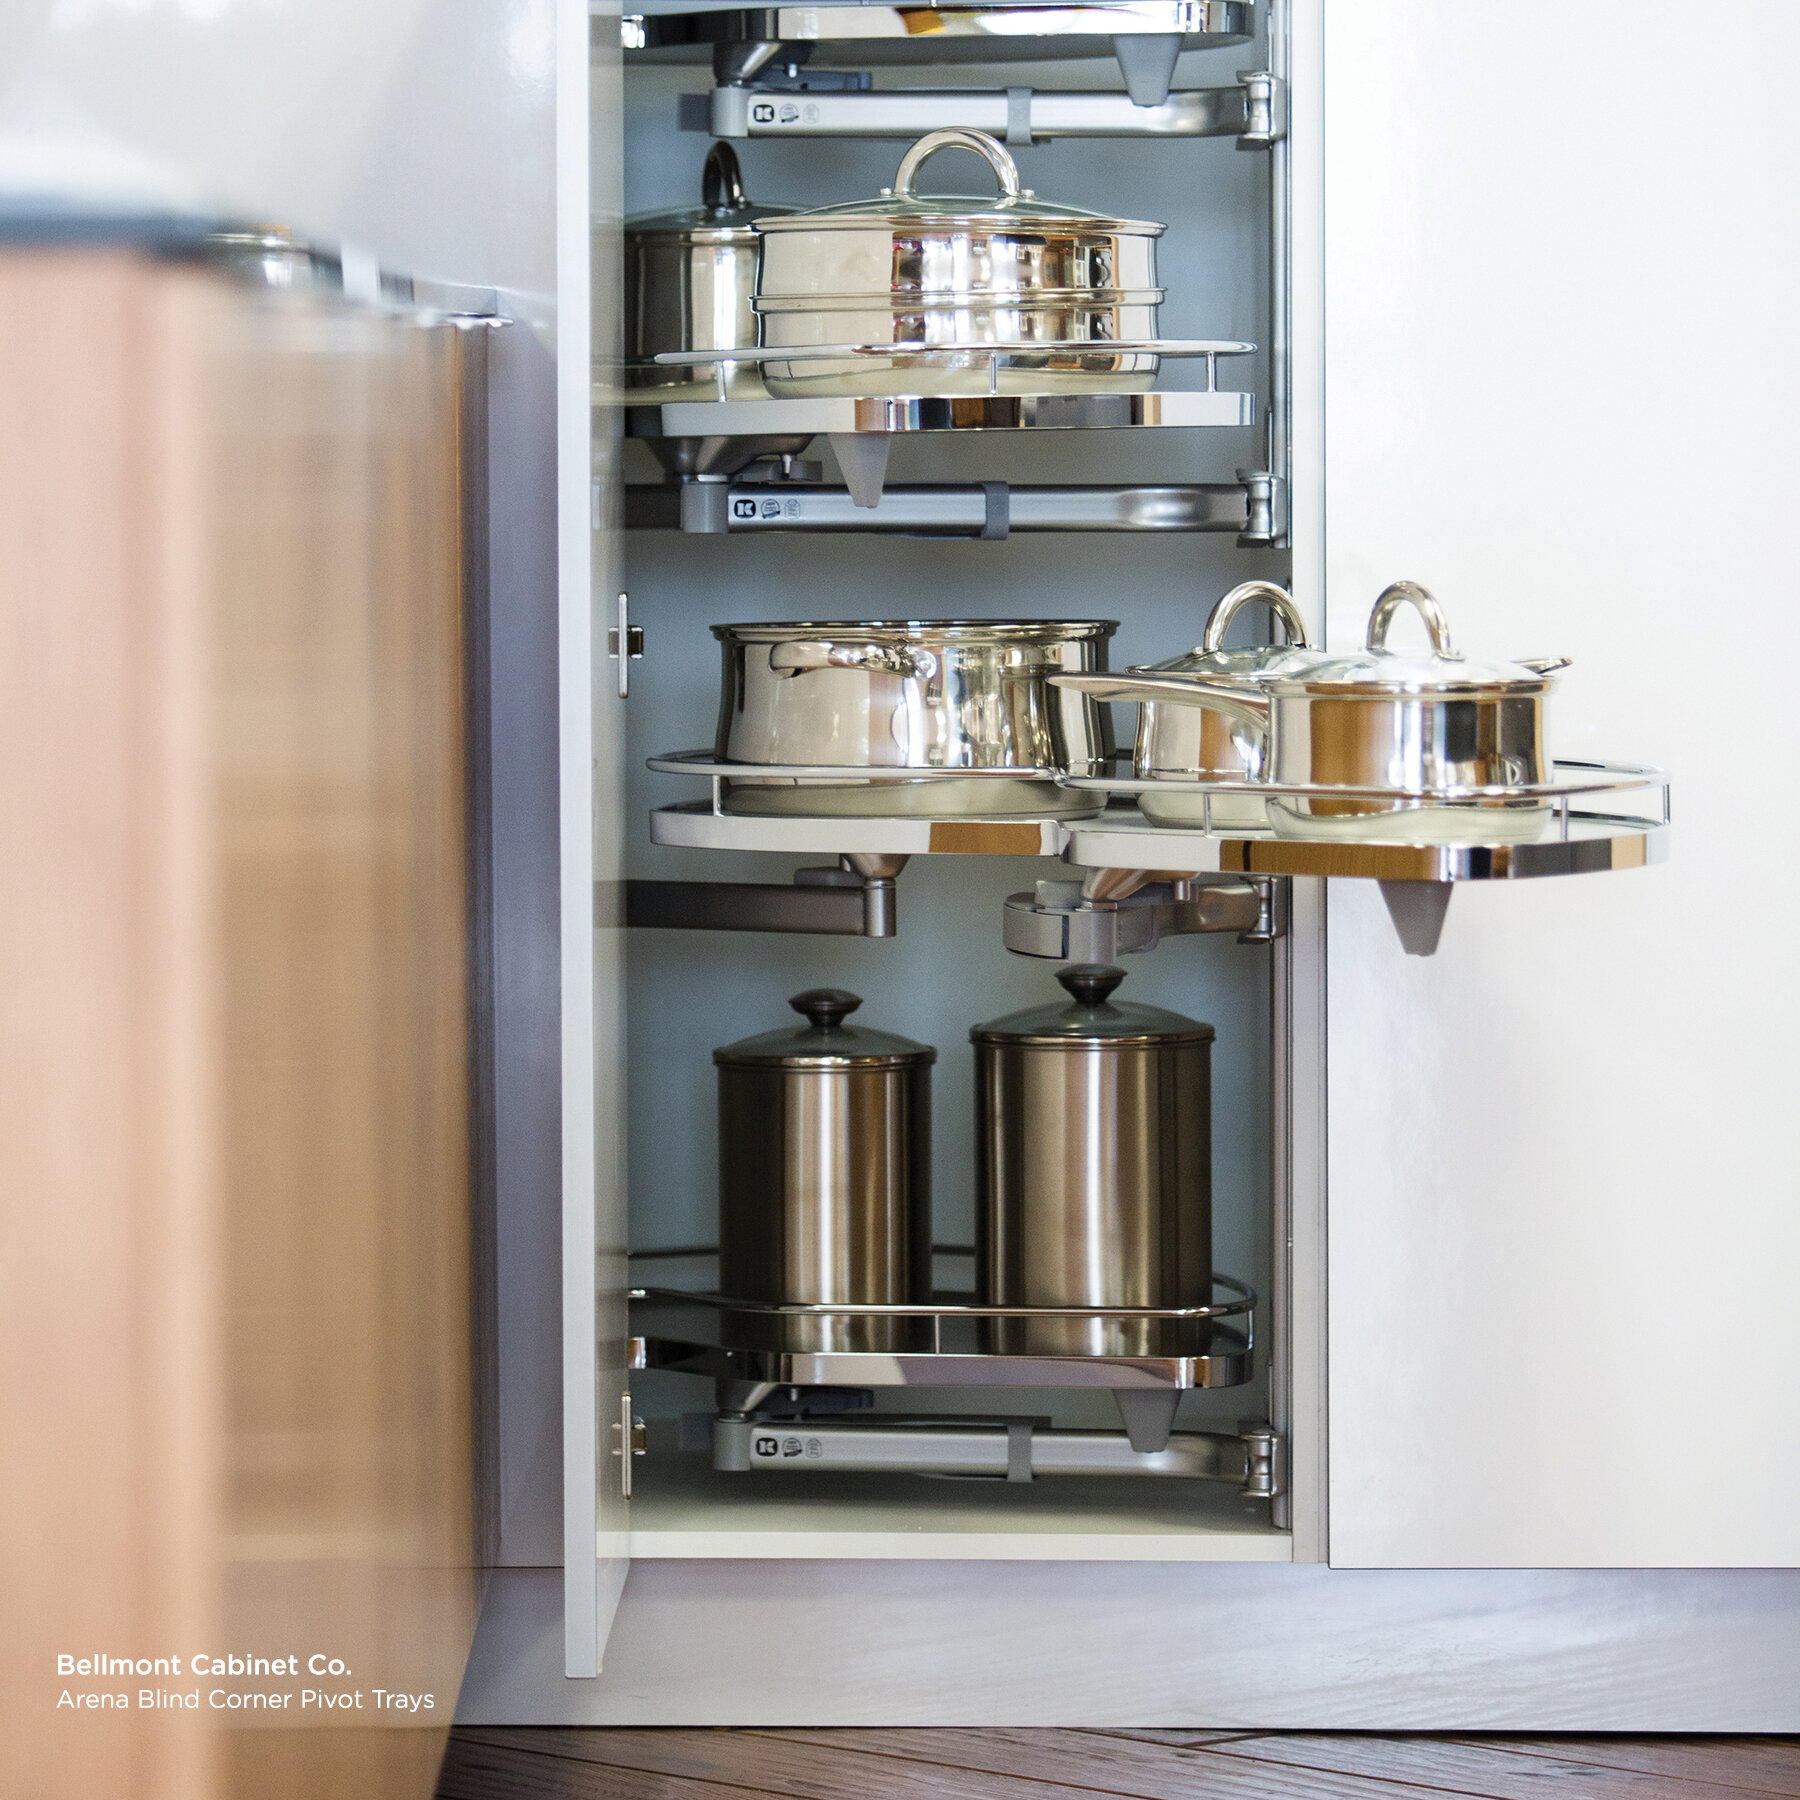
#4 - Corner Storage is one of the other places to pay particular attention when designing a kitchen. There are 3 easy ways to make sure you’re not losing valuable storage space in your corners. The first is to use a “Super Susan.” This means that the corner base cabinet would have 2 Pac-Man shaped wood trays that spin independently. The top one is on a shelf in the center of the cabinet and the other mounted on the bottom of the cabinet. these spinning shelves DO NOT have the pole through the middle like the old “Lazy Susan” cabinets. The second is a unit called the Magic Corner. This is used in a blind corner cabinet and is a fantastic way to use the depth of the blind corner without having to reach your arm way back into the void! The final option for addressing a corner is to use a tall pantry cabinet that is also a blind corner cabinet. By using a series of pivoting trays that make access to the corner a simple and graceful solution. This can be a very effective way to use the vertical height of corners to their fullest!

Bellmont Arena Pivot Trays.jpg

#5 - The final aspect that is universal to all kitchens is the importance of the quality of the finish. When my sister was 4 years old she found a can of paint in our garage and thought she would be super helpful by repainting the family car. Needless to say, that was not a good paint job. There’s nothing better than a factory finish for cars and the same is true for cabinetry. An environment that is dust free, temperature controlled, contains a finishing booth and automated finishing machines will leave your cabinets with the toughest finishes available. Because your cabinets finish matters it’s important to do a bit of research before you make a purchase. Look out for water based paints or stains and beware of any finish that is applied on site. Ask what the warranty will be on not only the structure of the cabinets but on the finish as well. Be sure your money is well spent on the QUALITY of a superior finish.

I’m sure there are 30 or 40 other items that deserved to be on this list, but these are the one I selected to focus on today. I’d be happy to hear what elements you are considering and what splurges you feel may be worth it vs. the ones that are a bit over the top!

If you want to do some additional research, toe kick lighting, lighted drawers, touch-latch automatic opening cabinets, paneled appliances, refrigerator drawers, steam ovens, floating shelves and waterfall countertops were some of my other prospective design elements that were considered for this post.

Land Park Kitchen Renovation

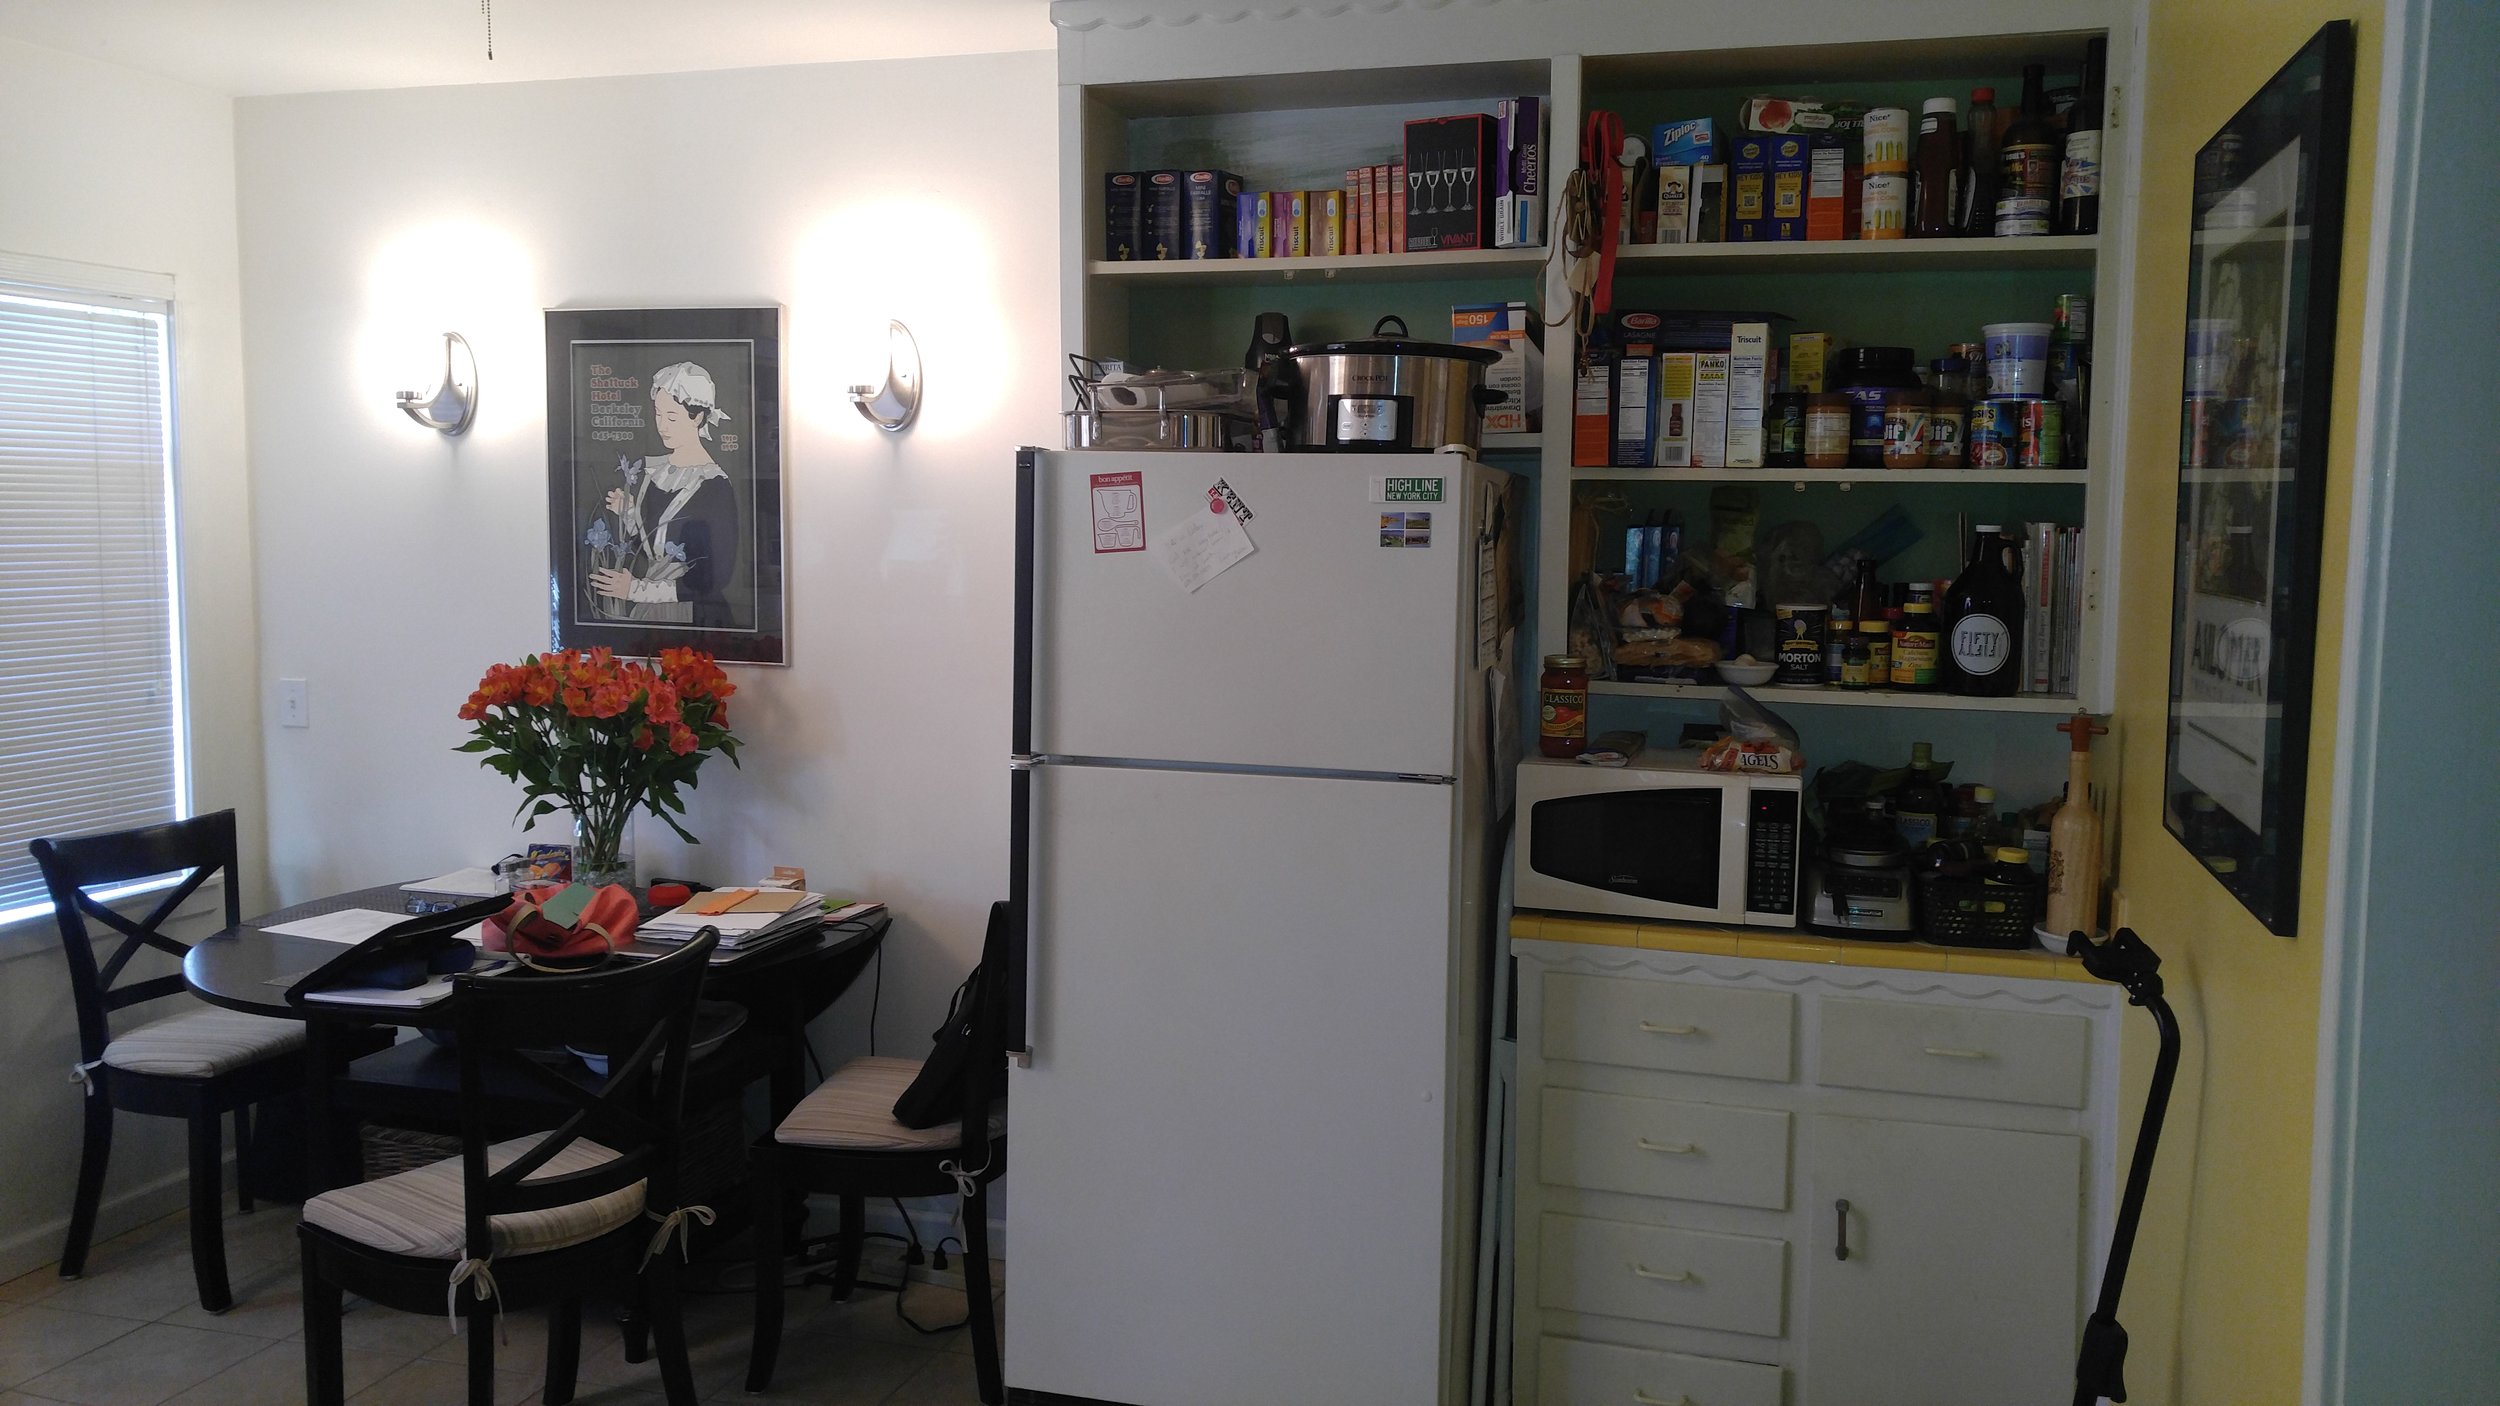
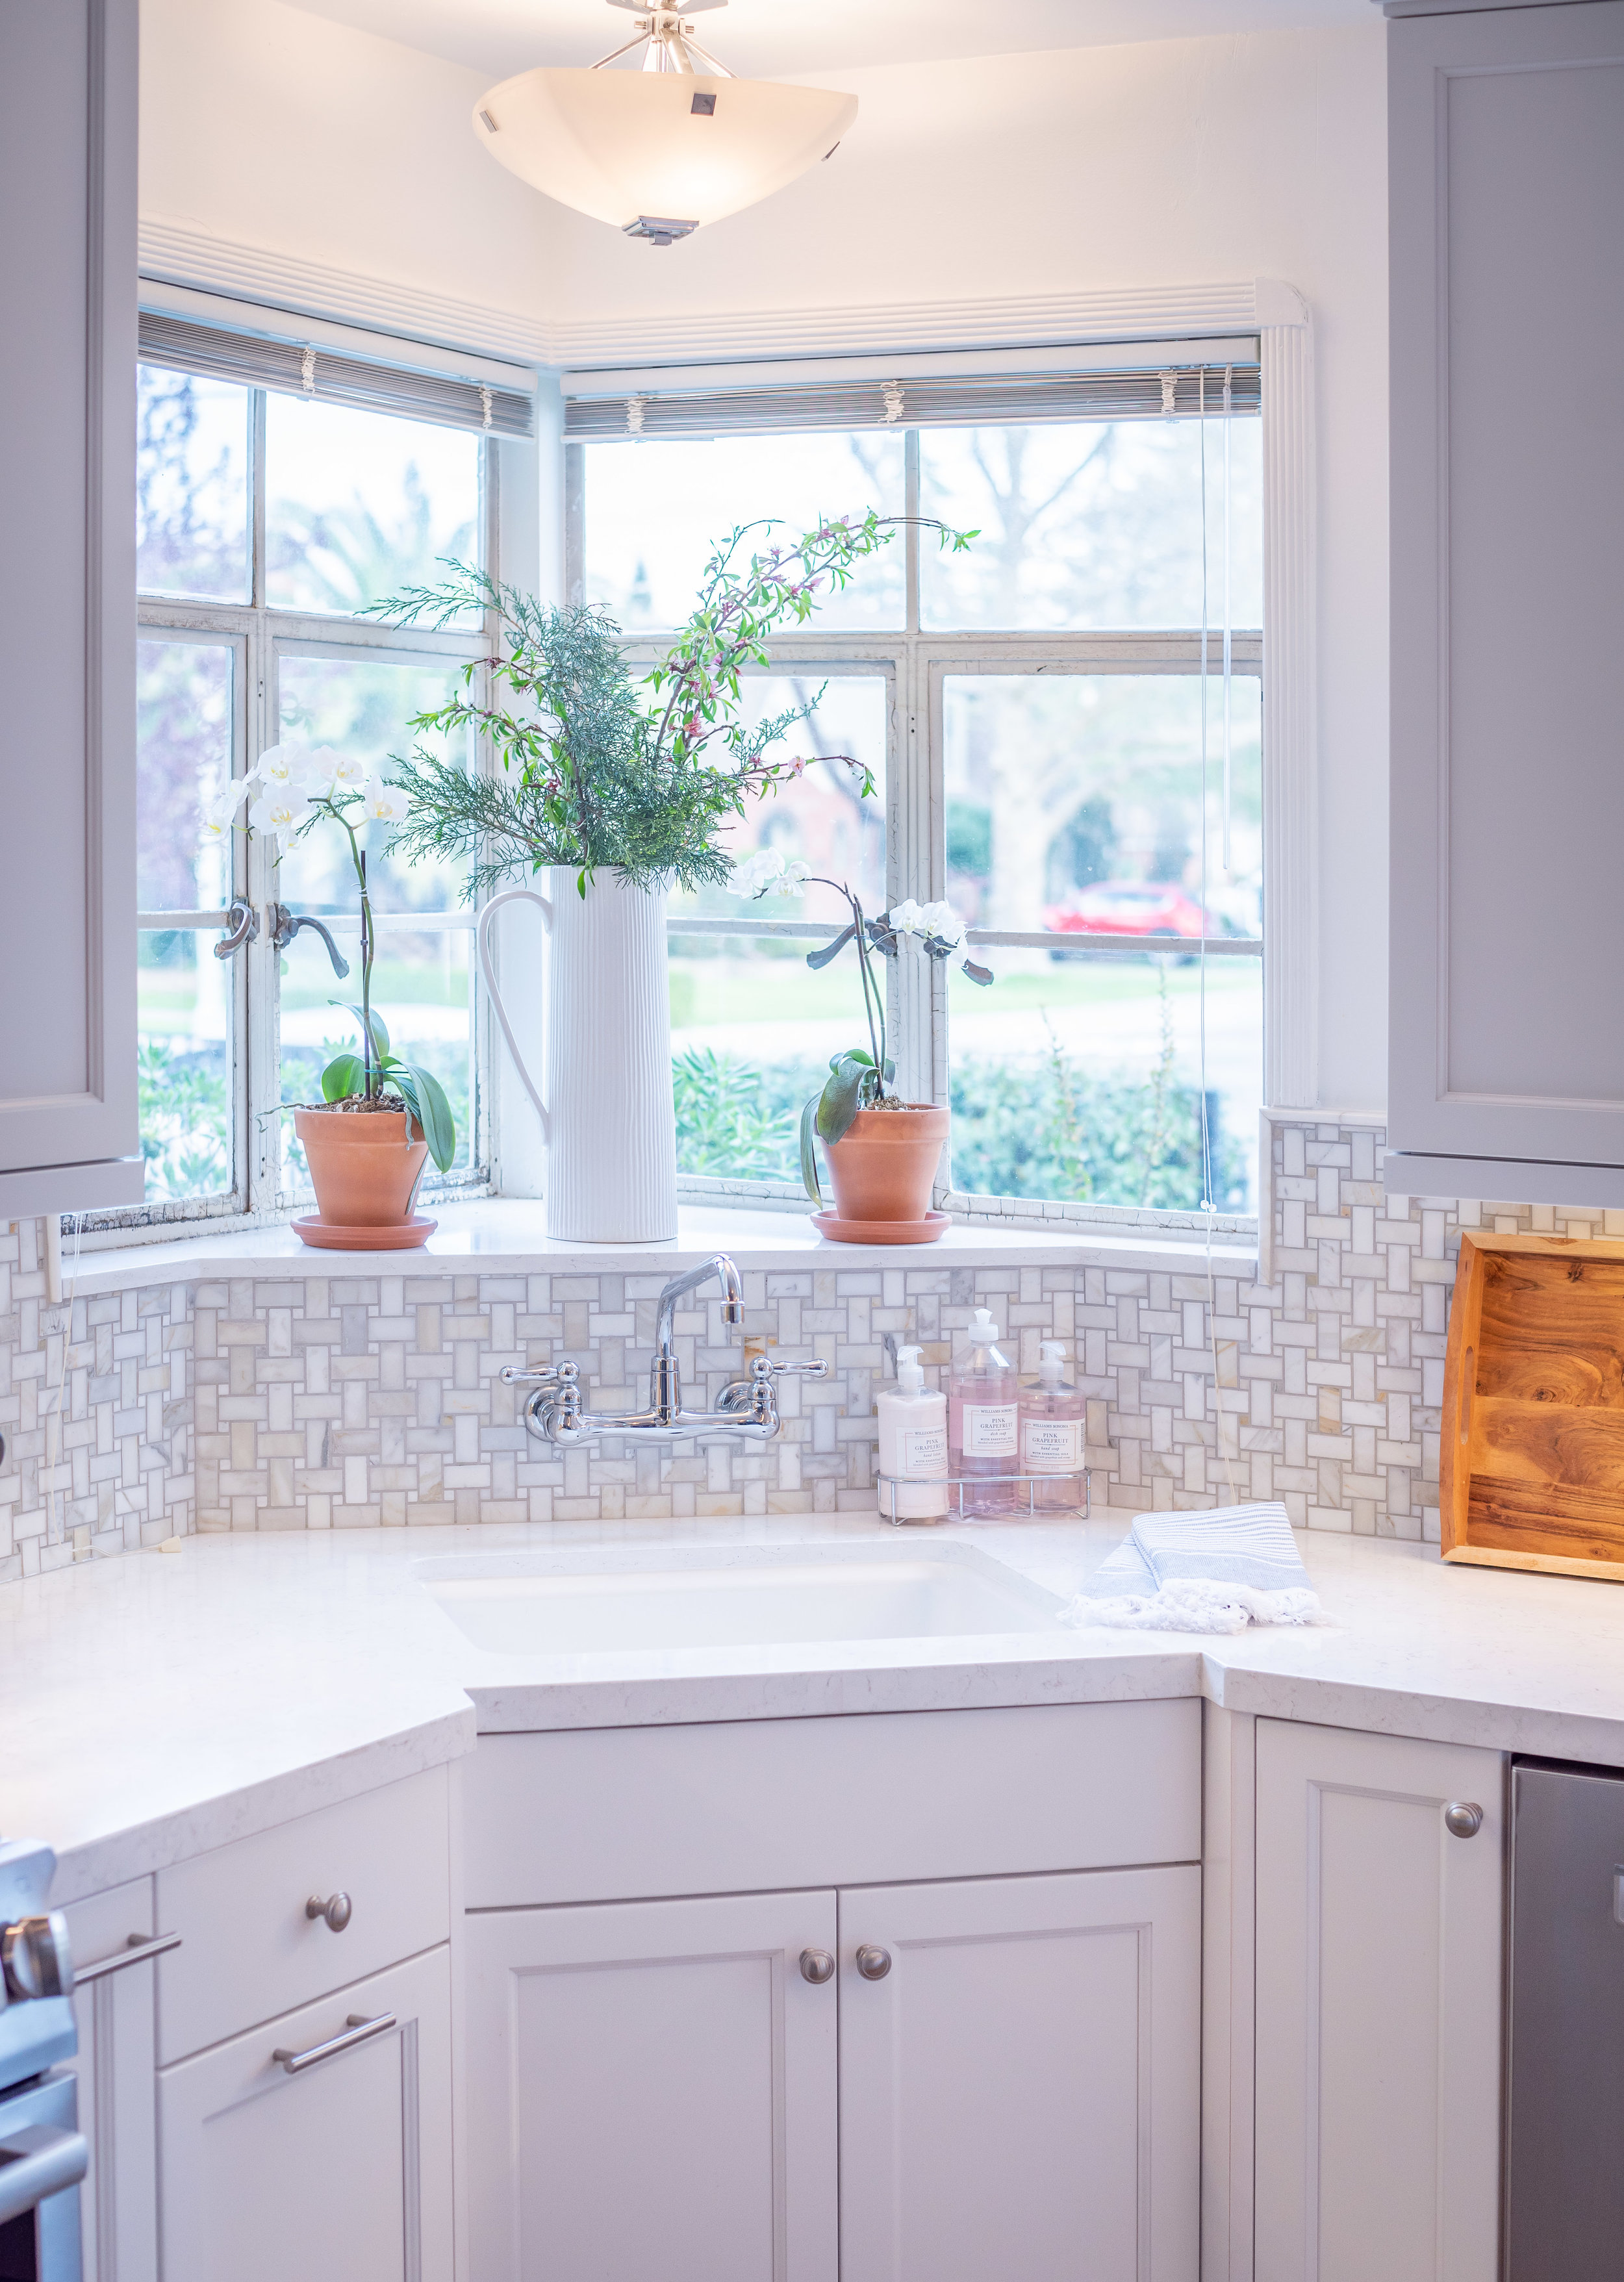
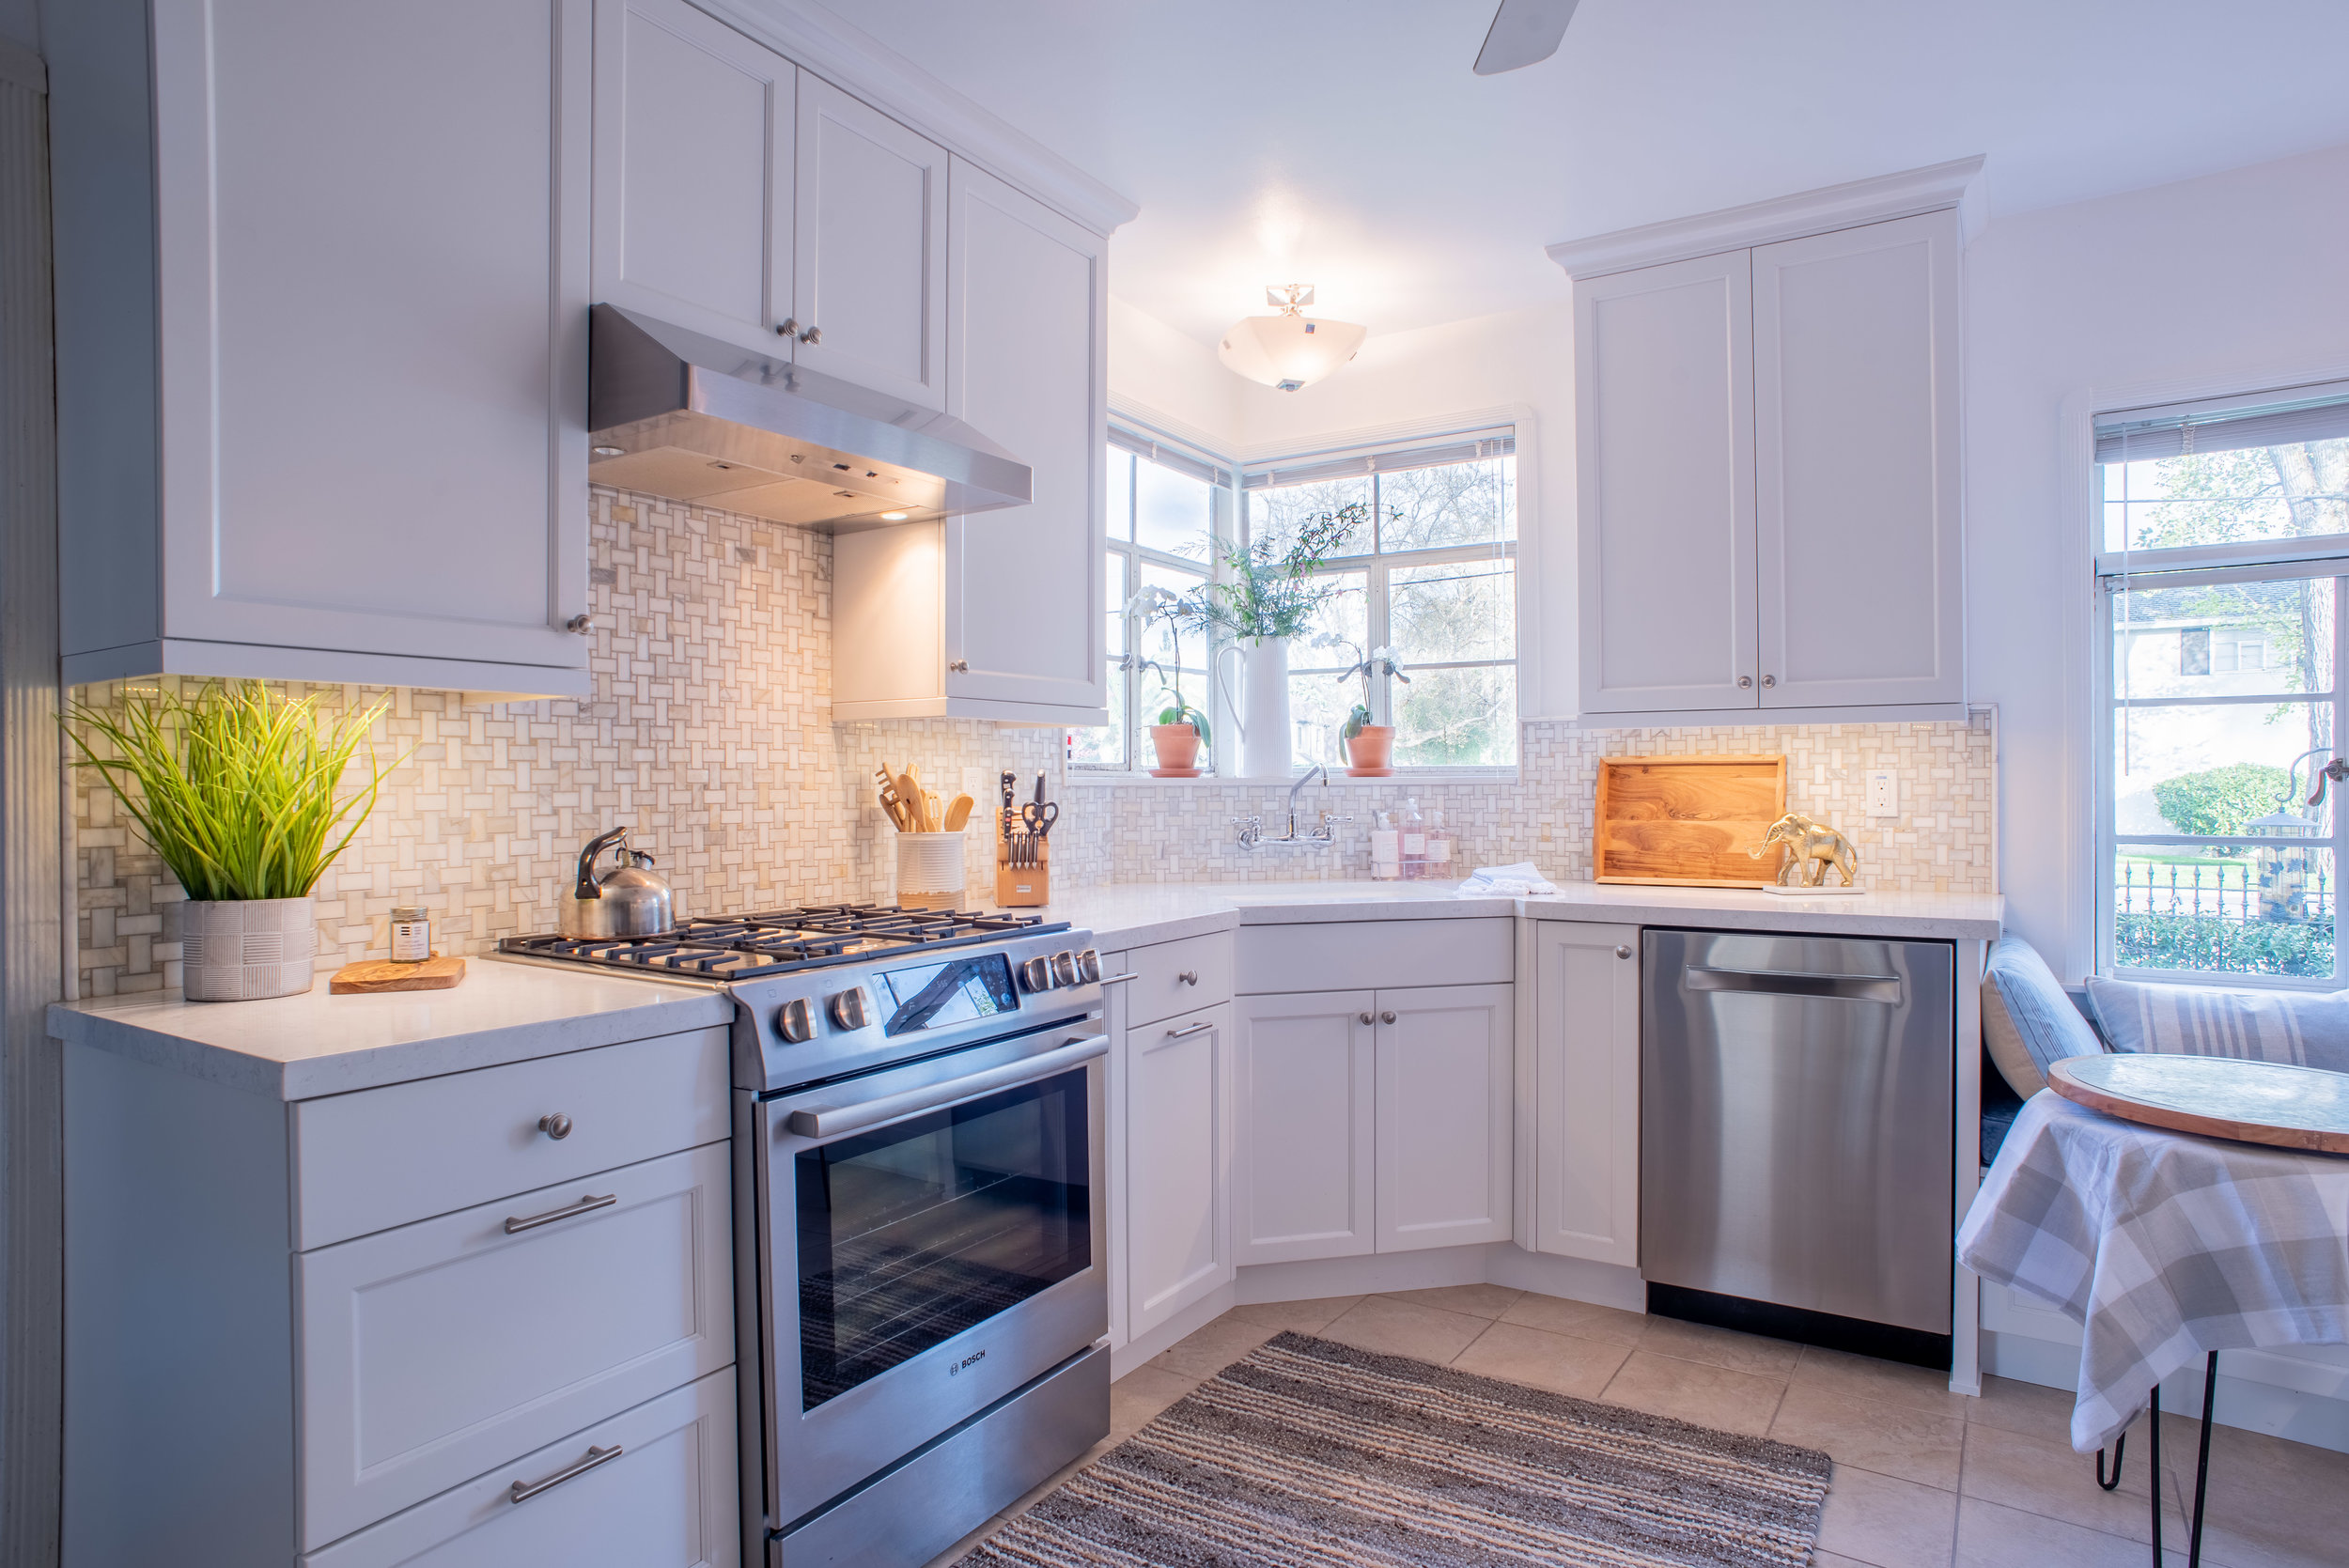
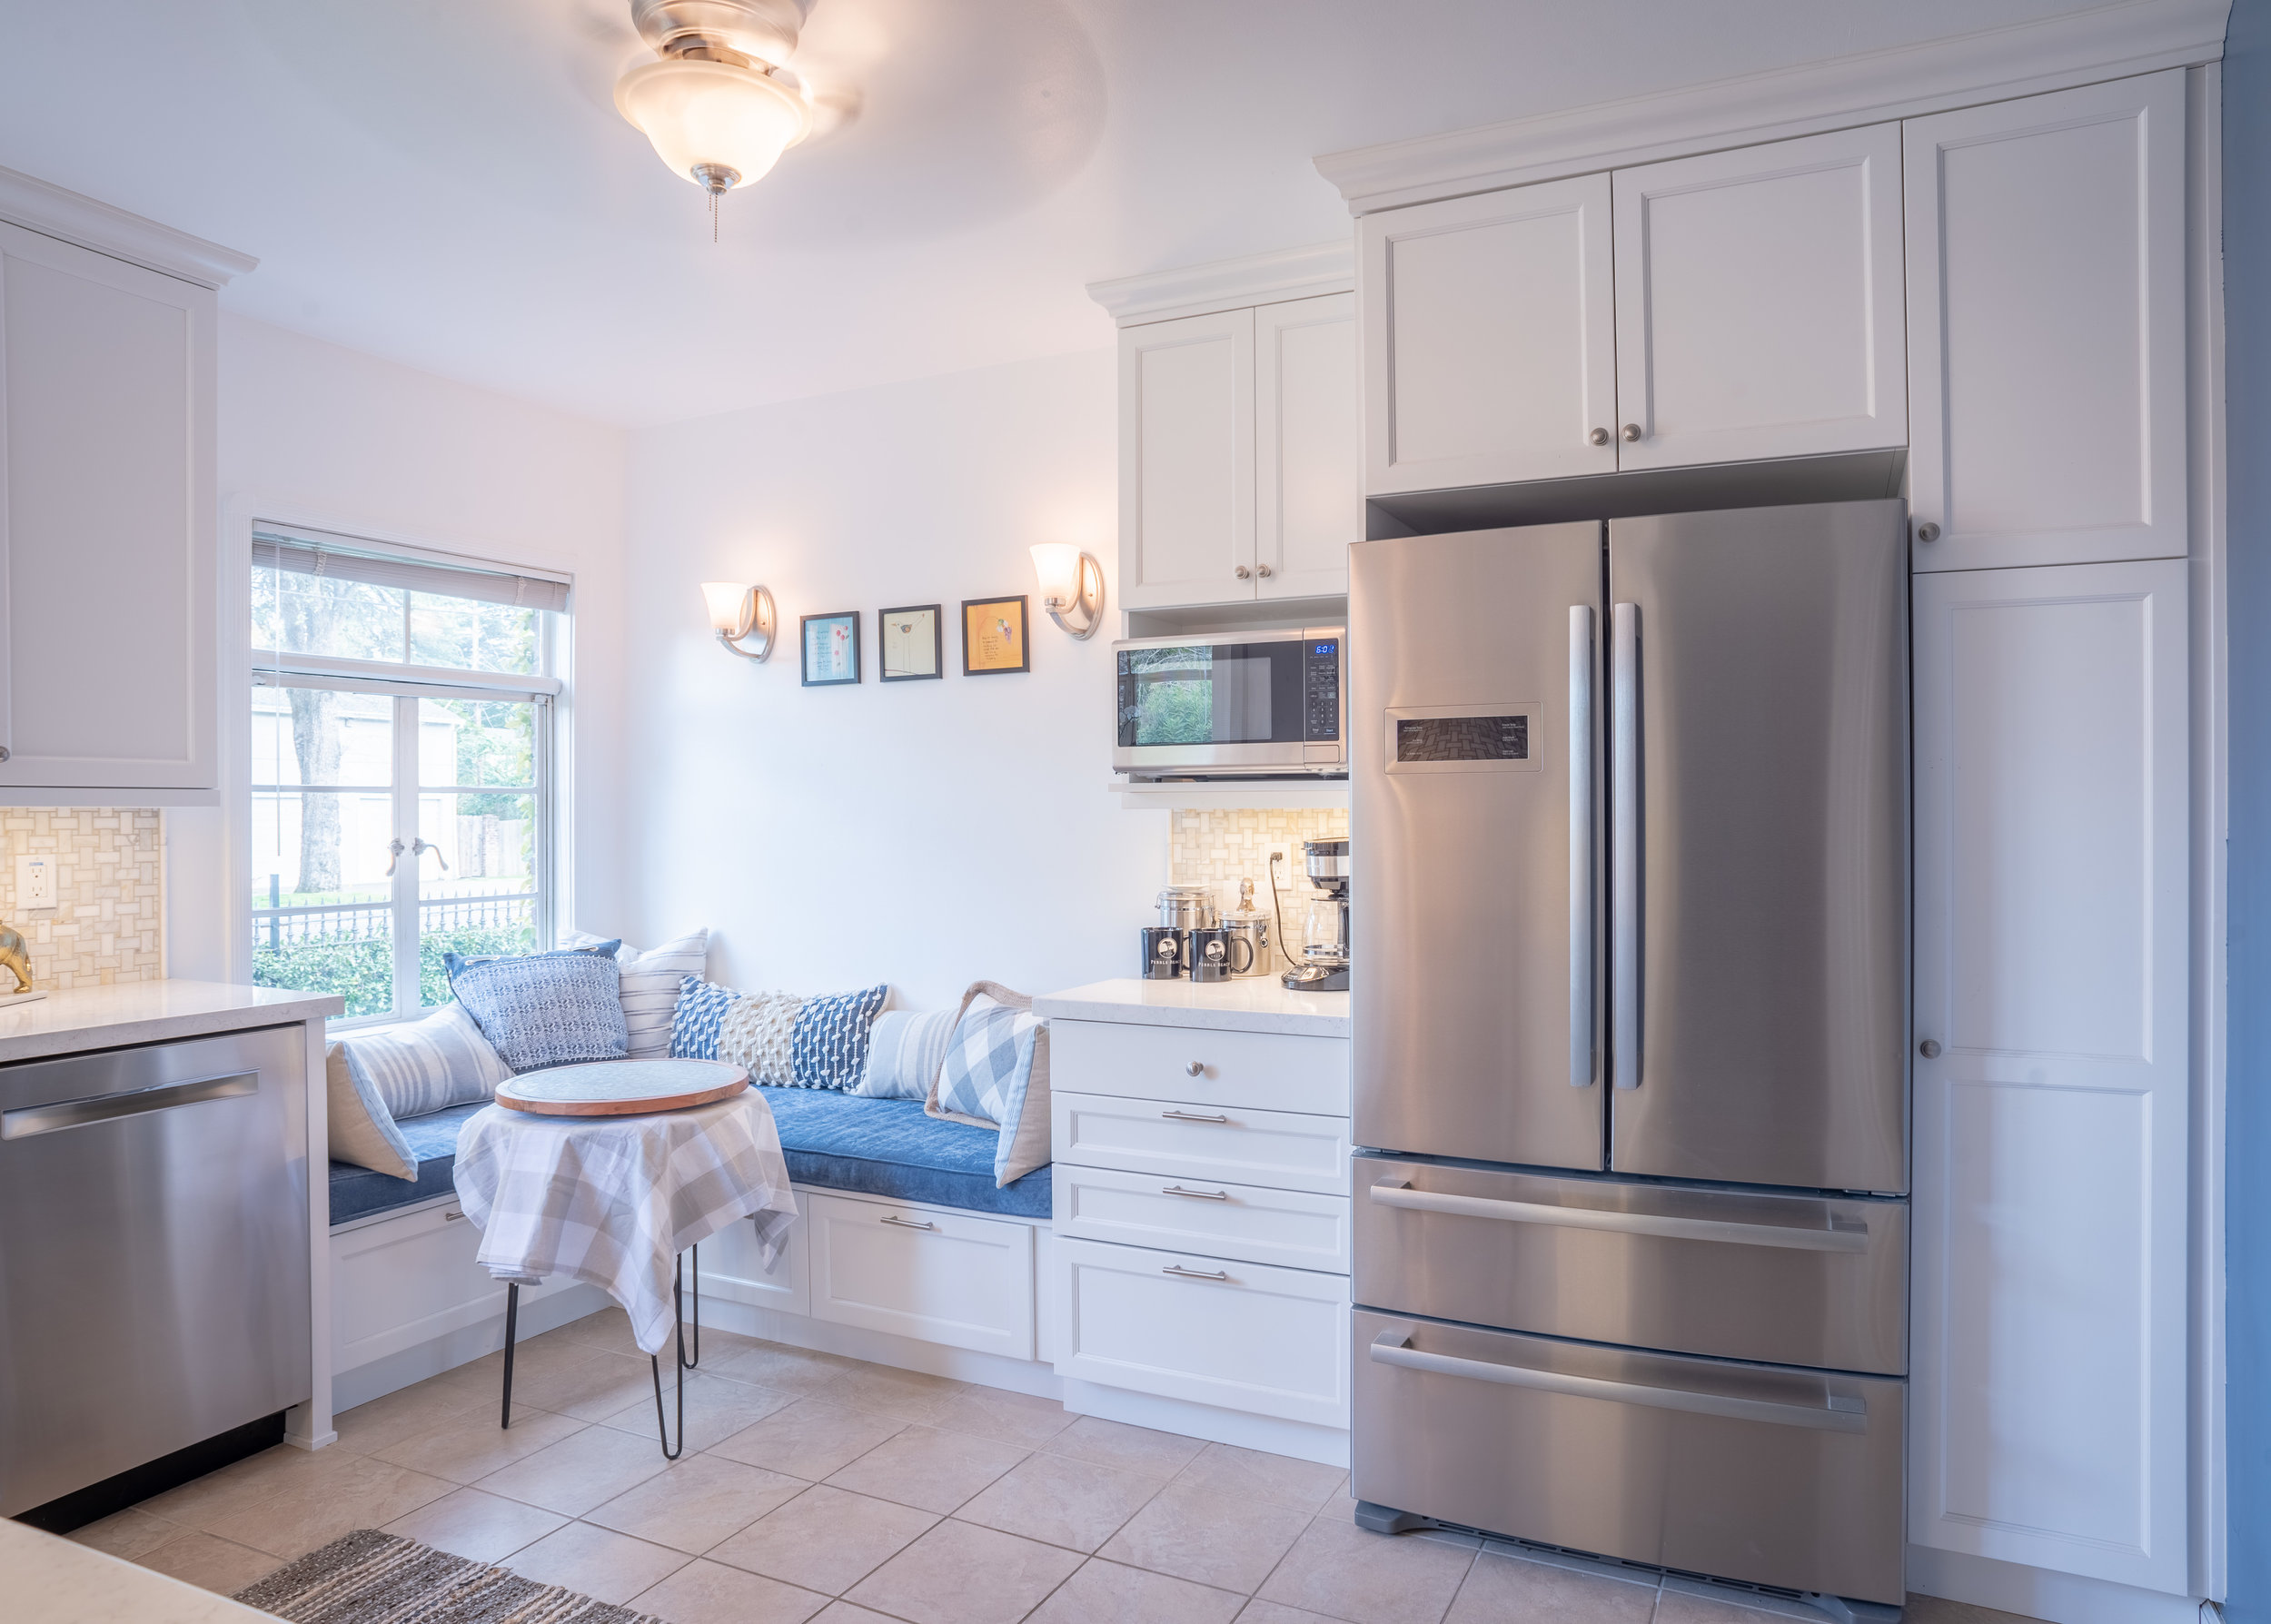
This lovely brick duplex in upper Land Park was built in 1942 and in need of some serious updating. My clients found me online and asked me to help bring their tiny kitchen into the 21st Century. They wanted to keep the look of the kitchen similar to what was existing but also wanted to add some modern amenities like… a dishwasher.

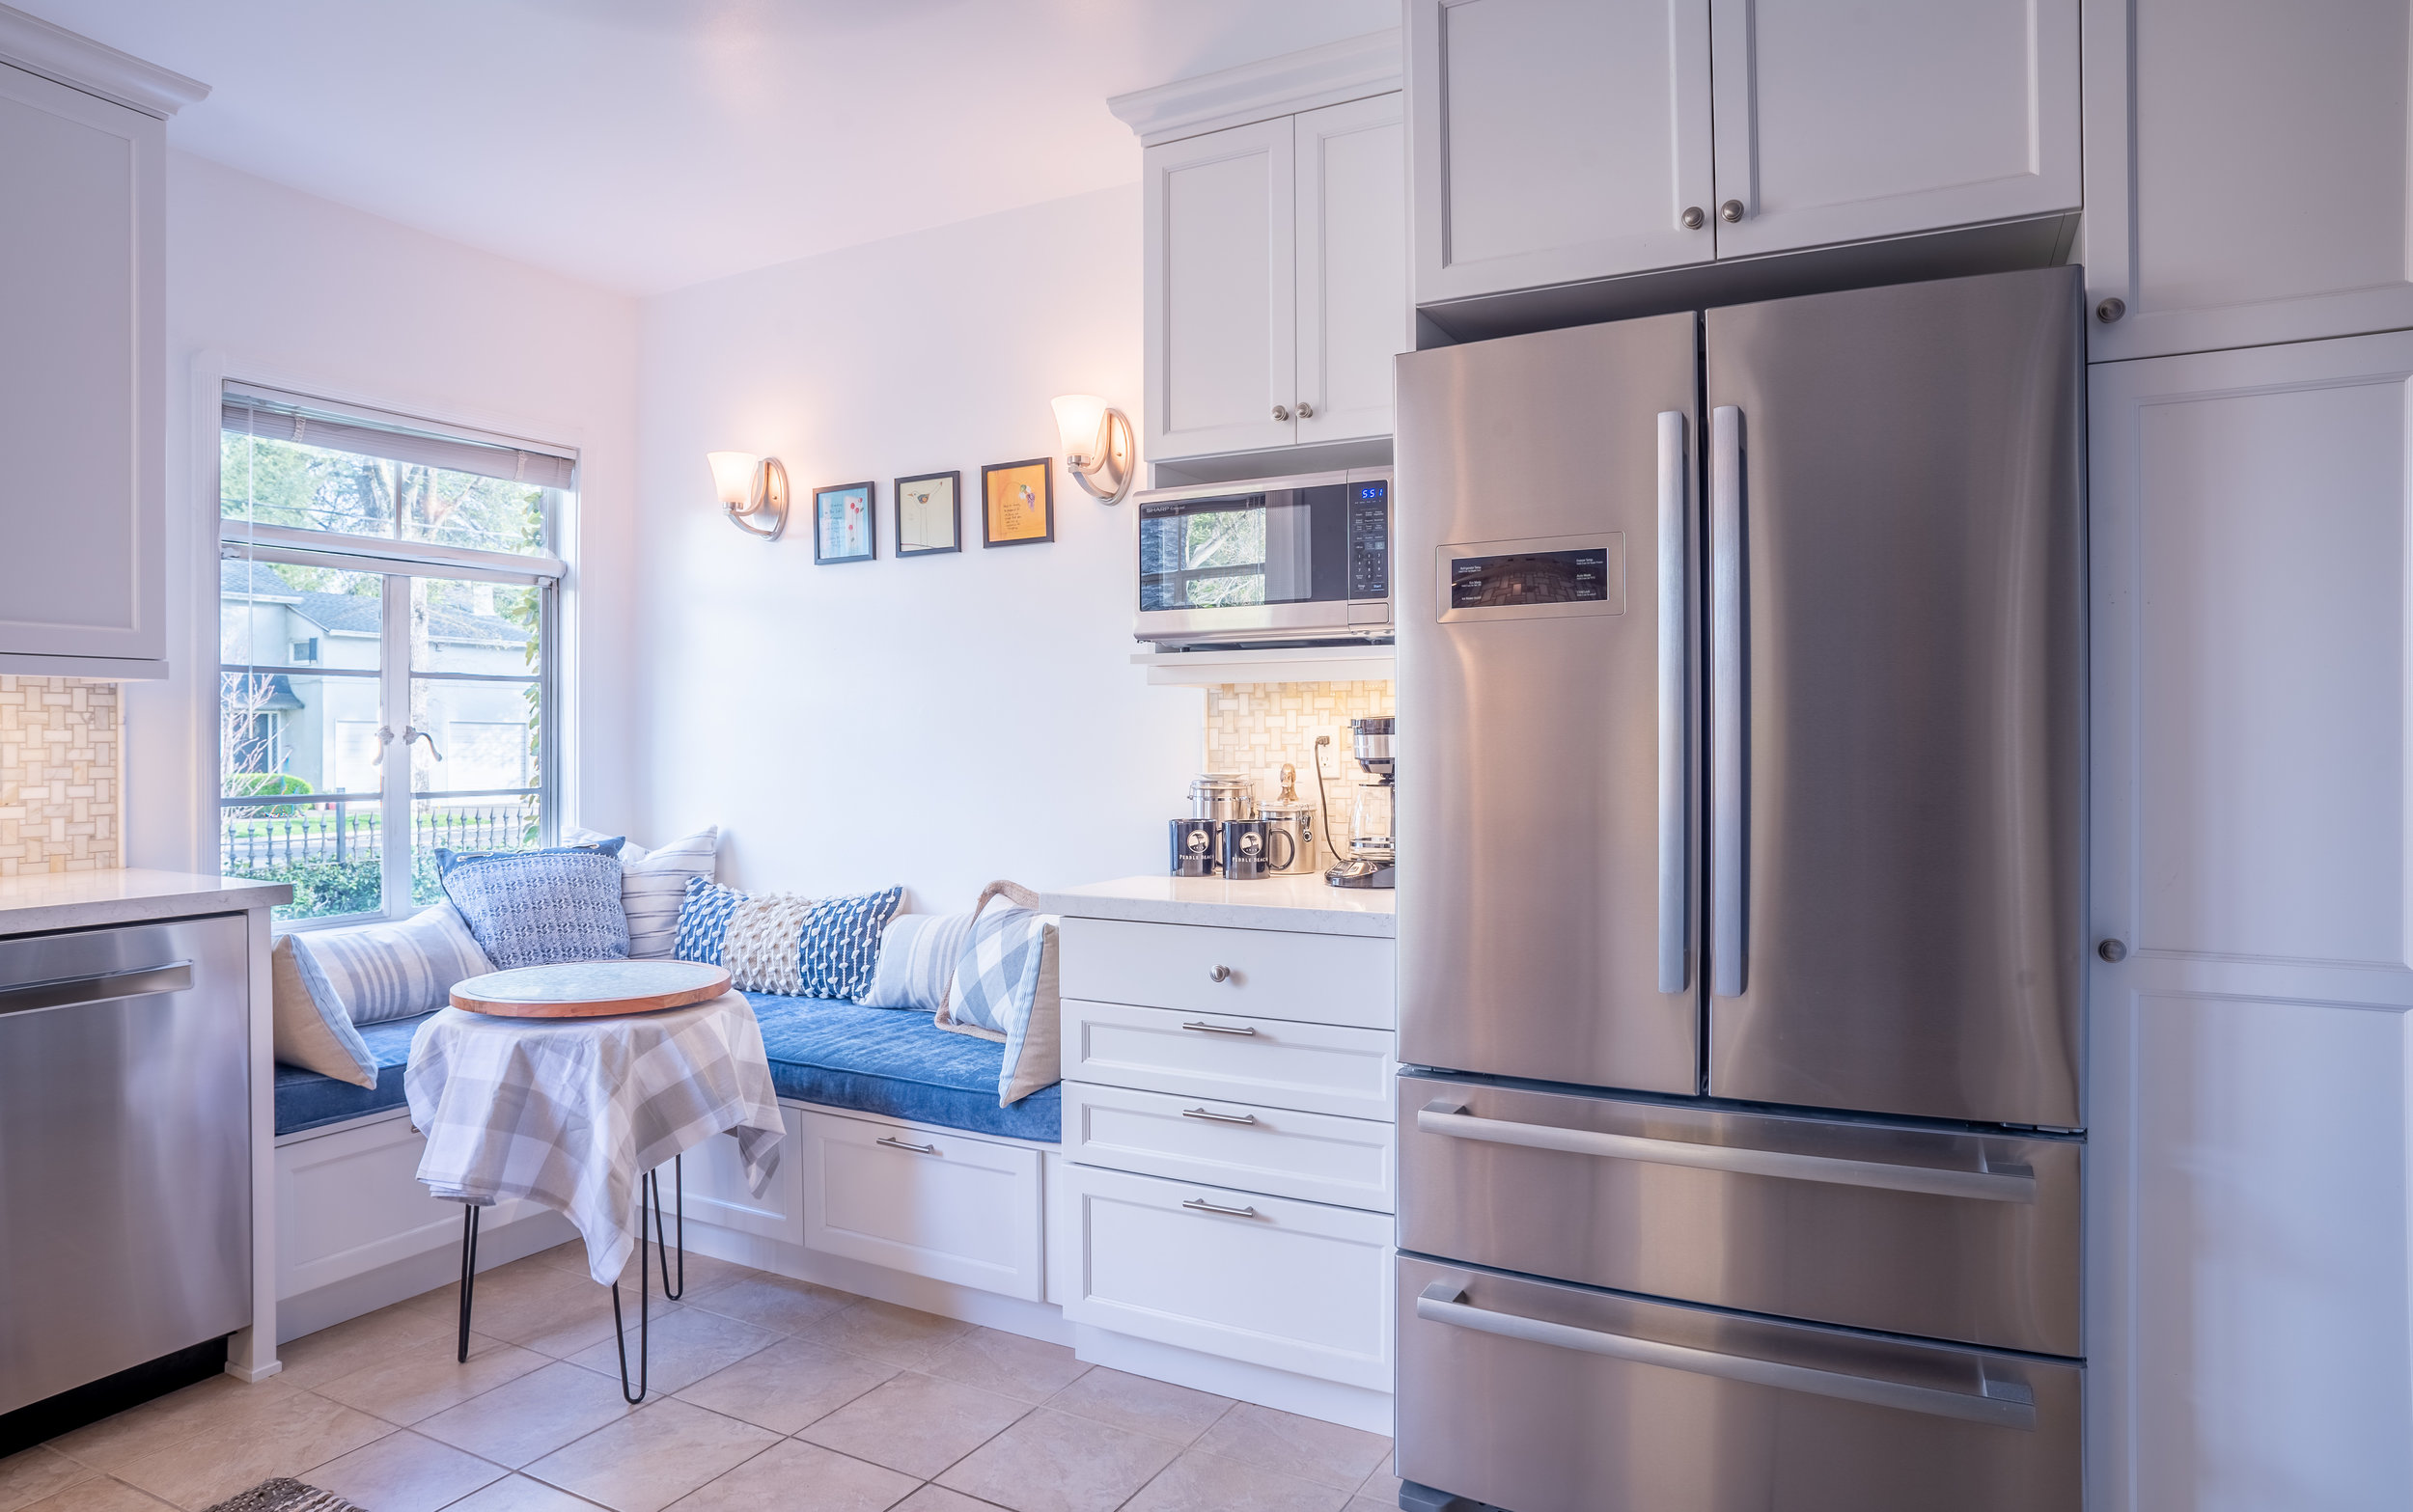
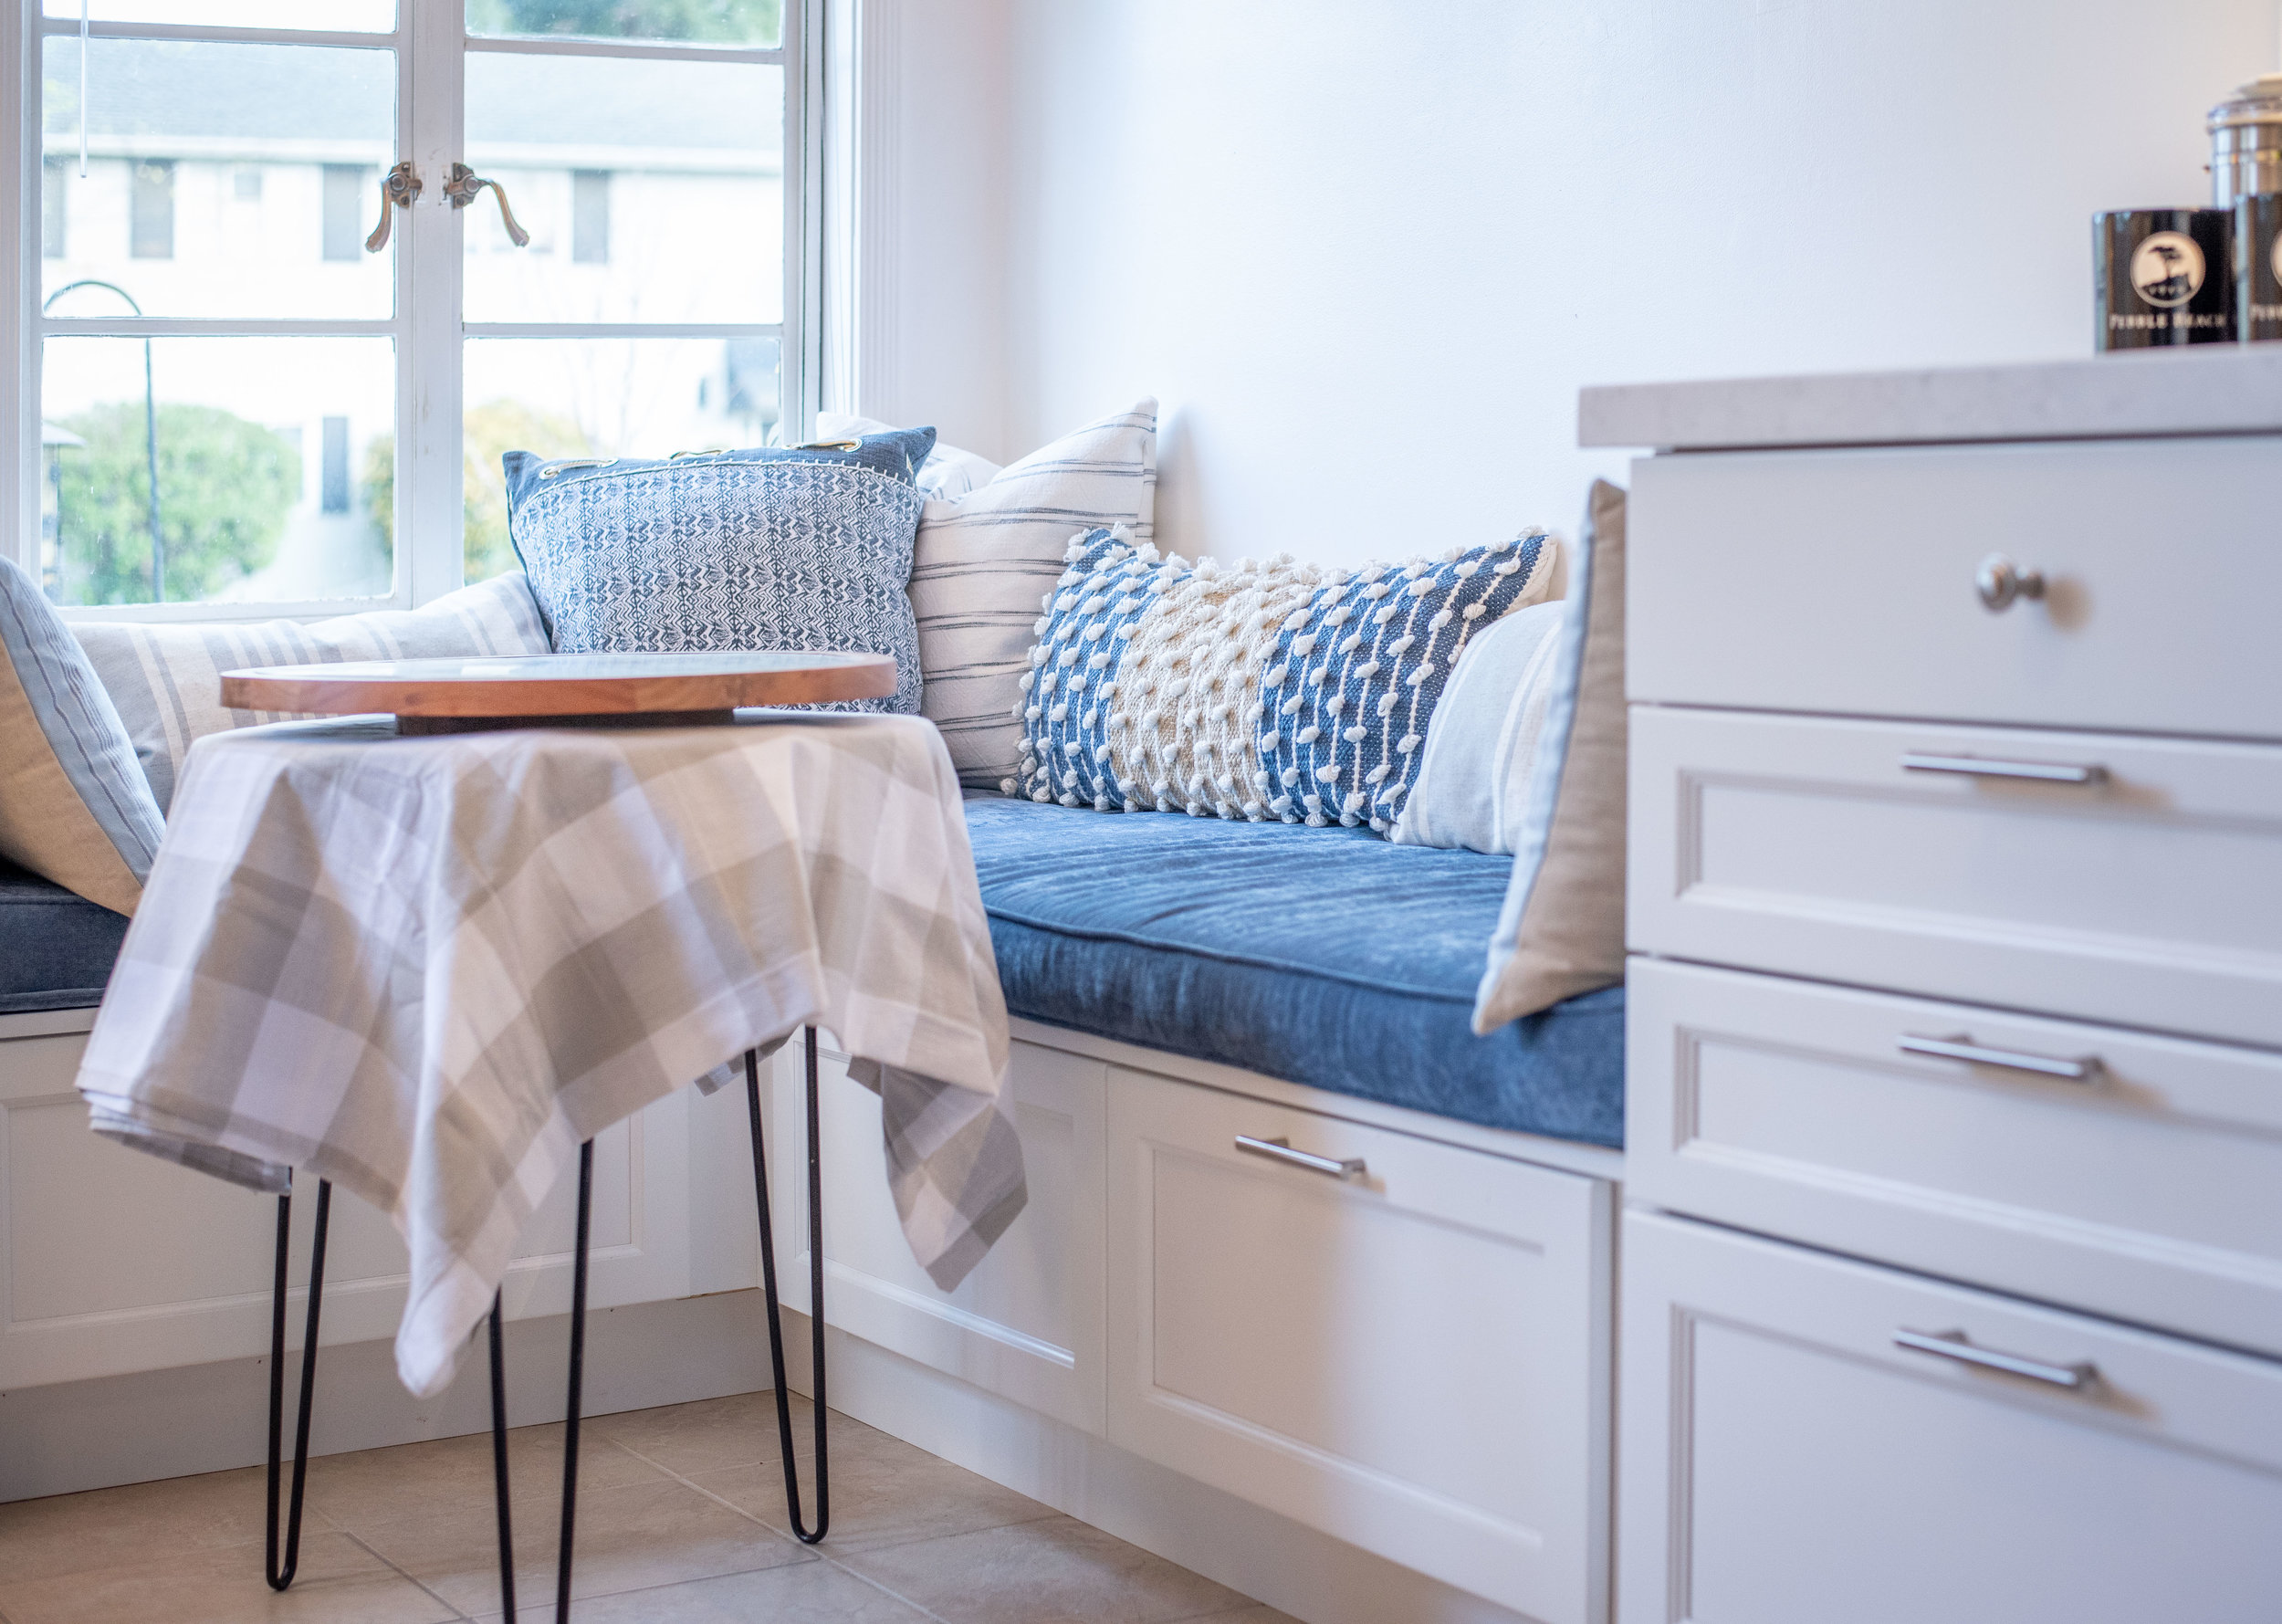
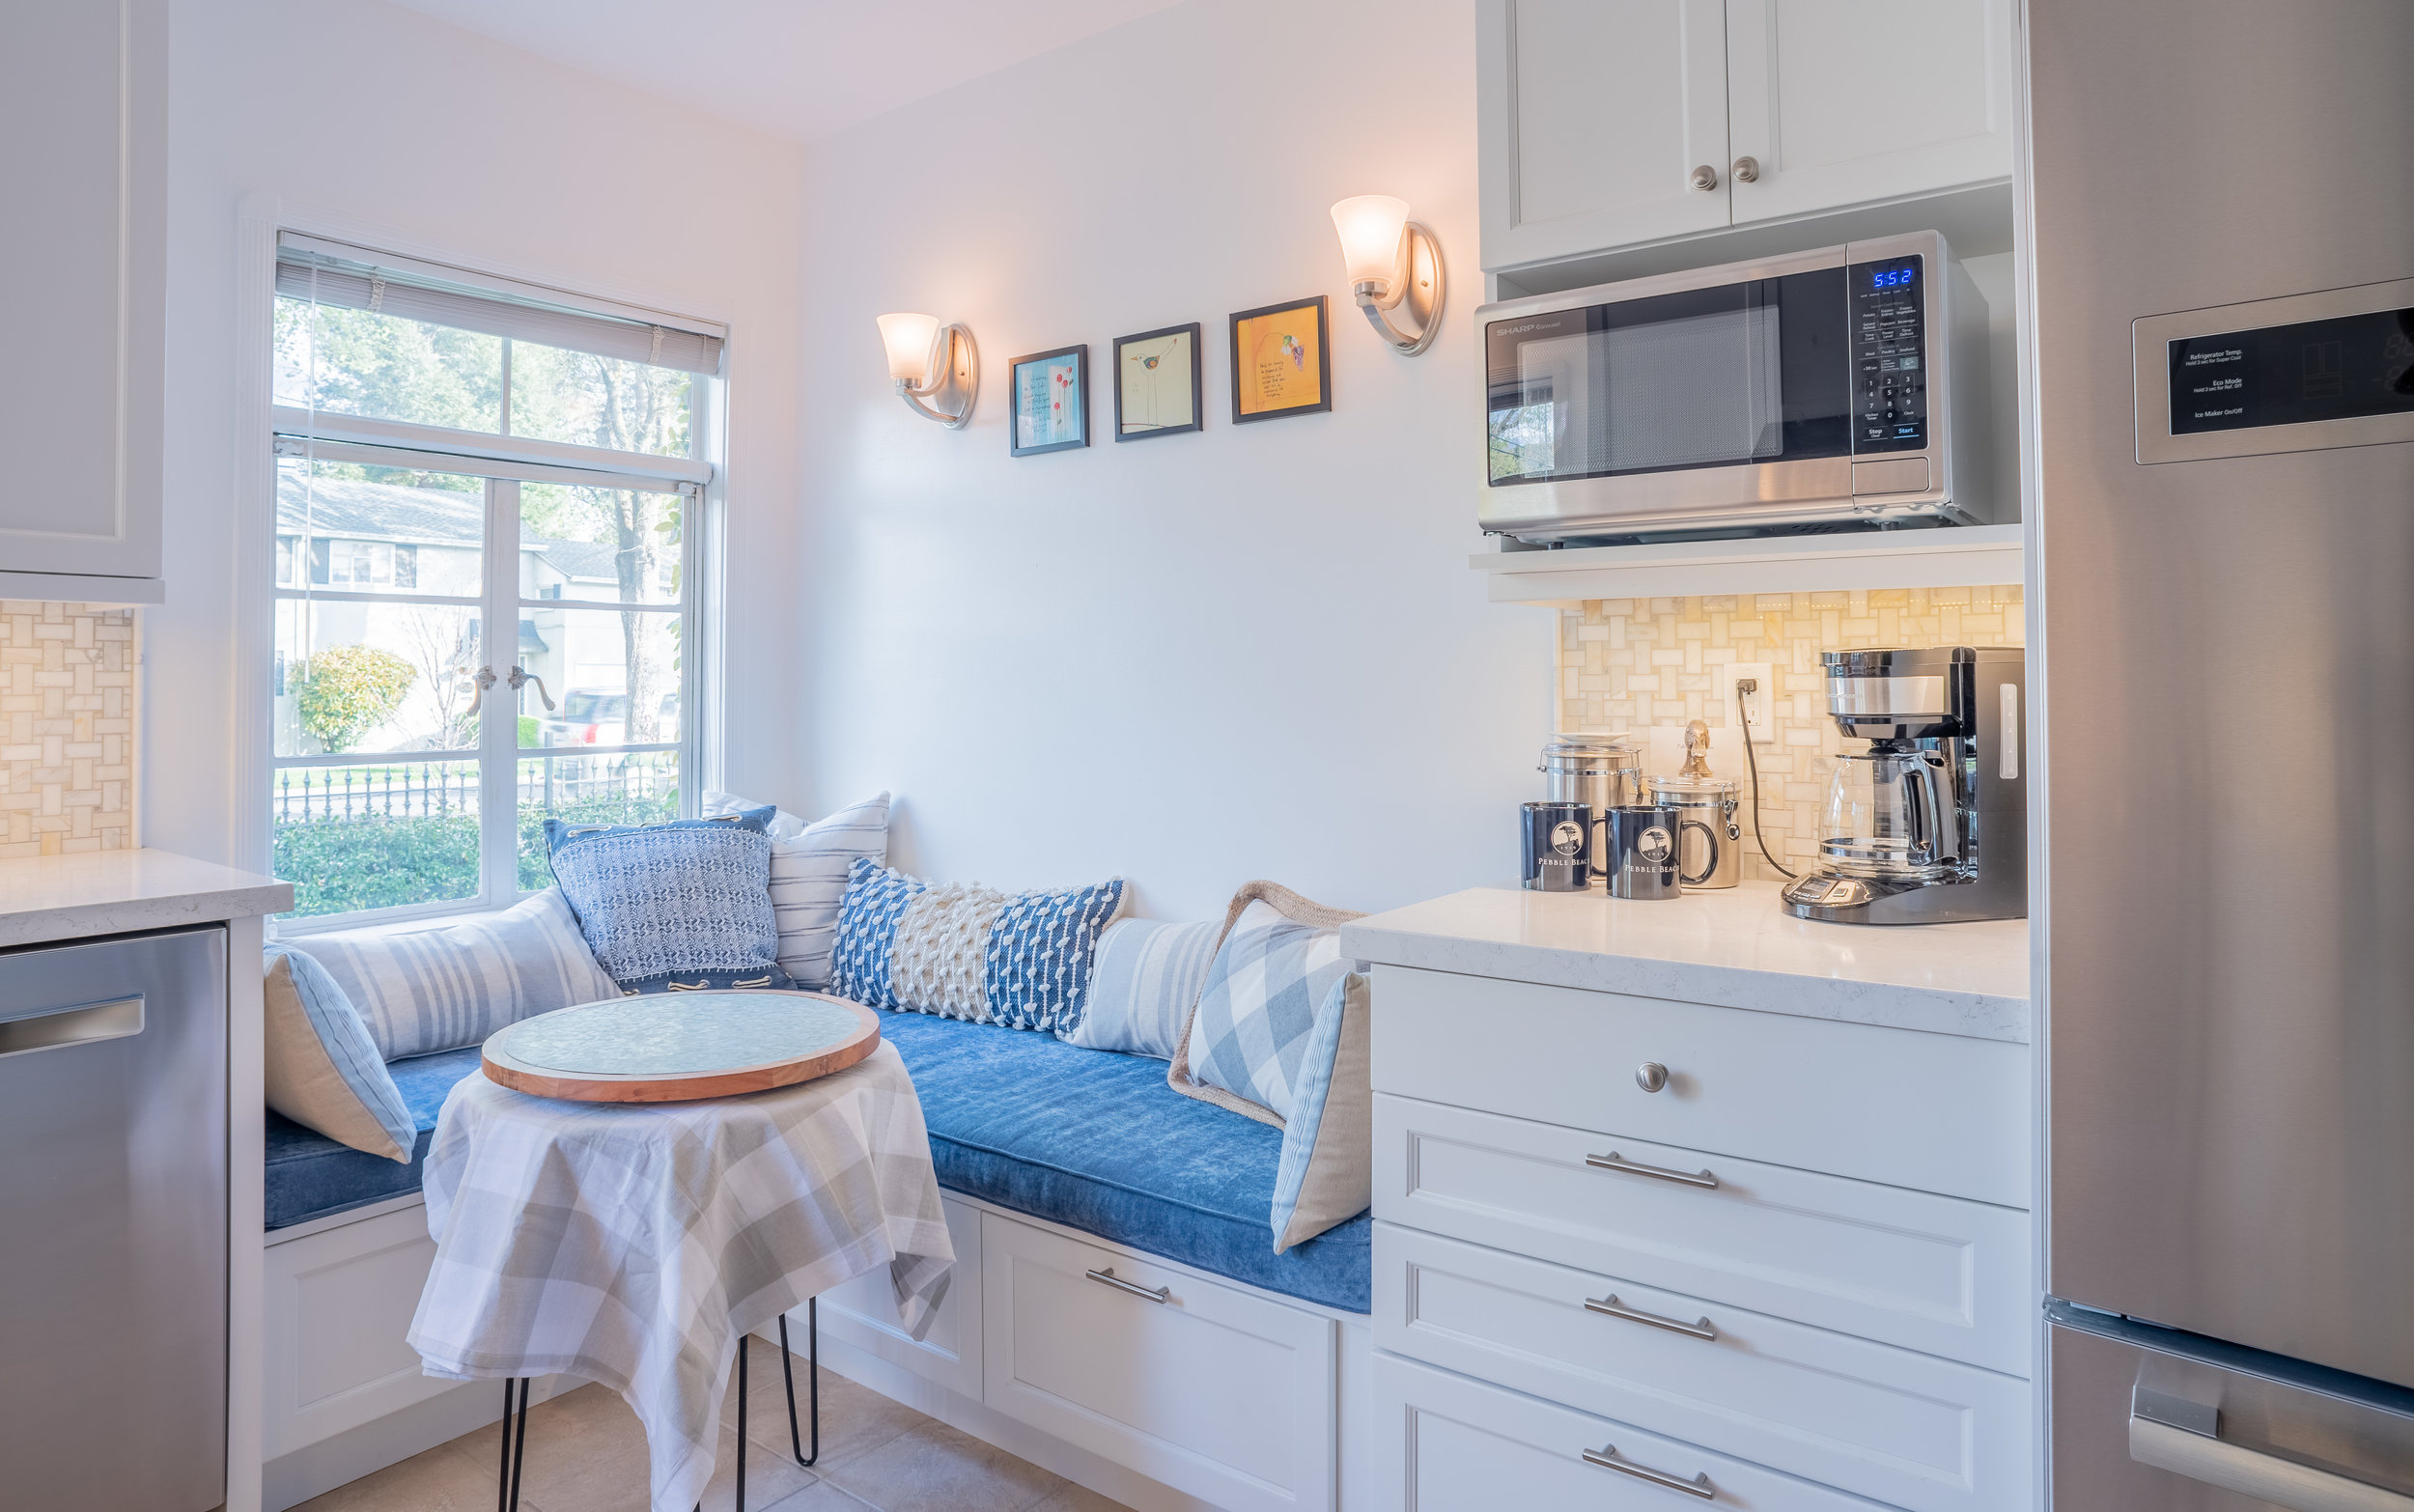
I knew we would lose some storage because of the dishwasher so I planned on adding bench seating to regain some of the storage space. The clients had recently installed new tile flooring that they wanted to keep, so the footprint of the new kitchen had to match up with the old layout.

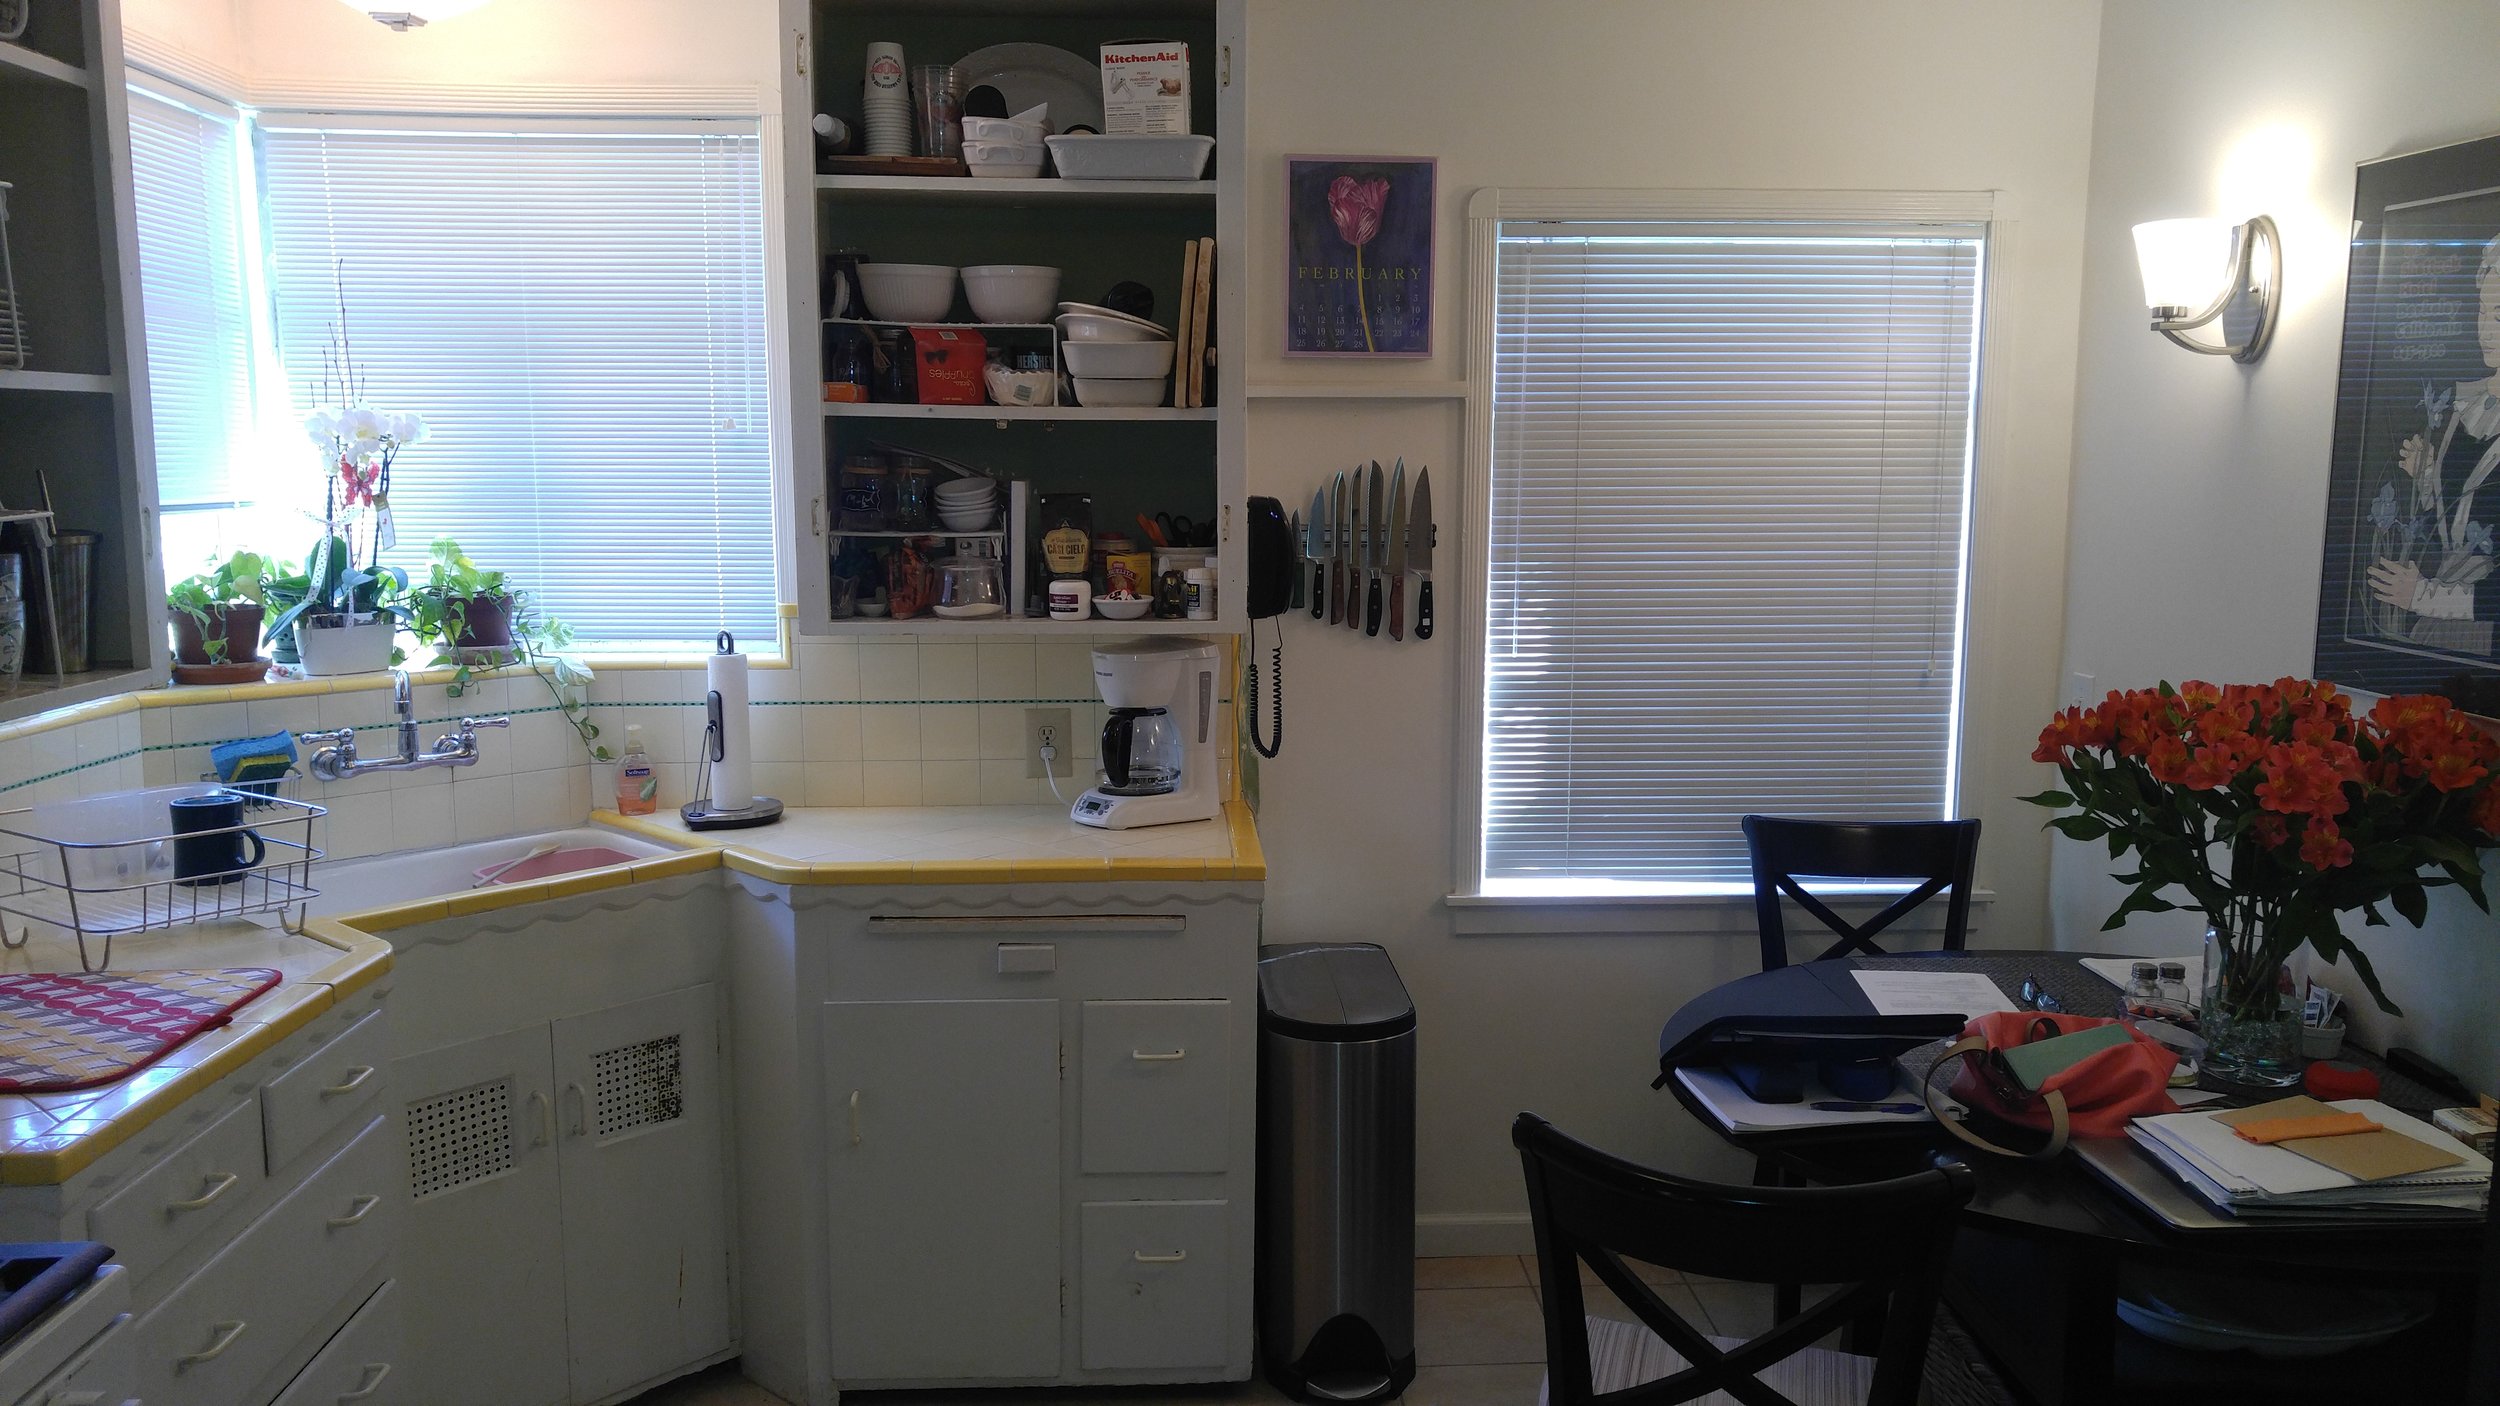
This is the area I had to work with…

Tiny spaces require some extra creativity! The clients wanted to upgrade to a full size refrigerator, add a dishwasher, increase storage and improve access to items in the cabinets.

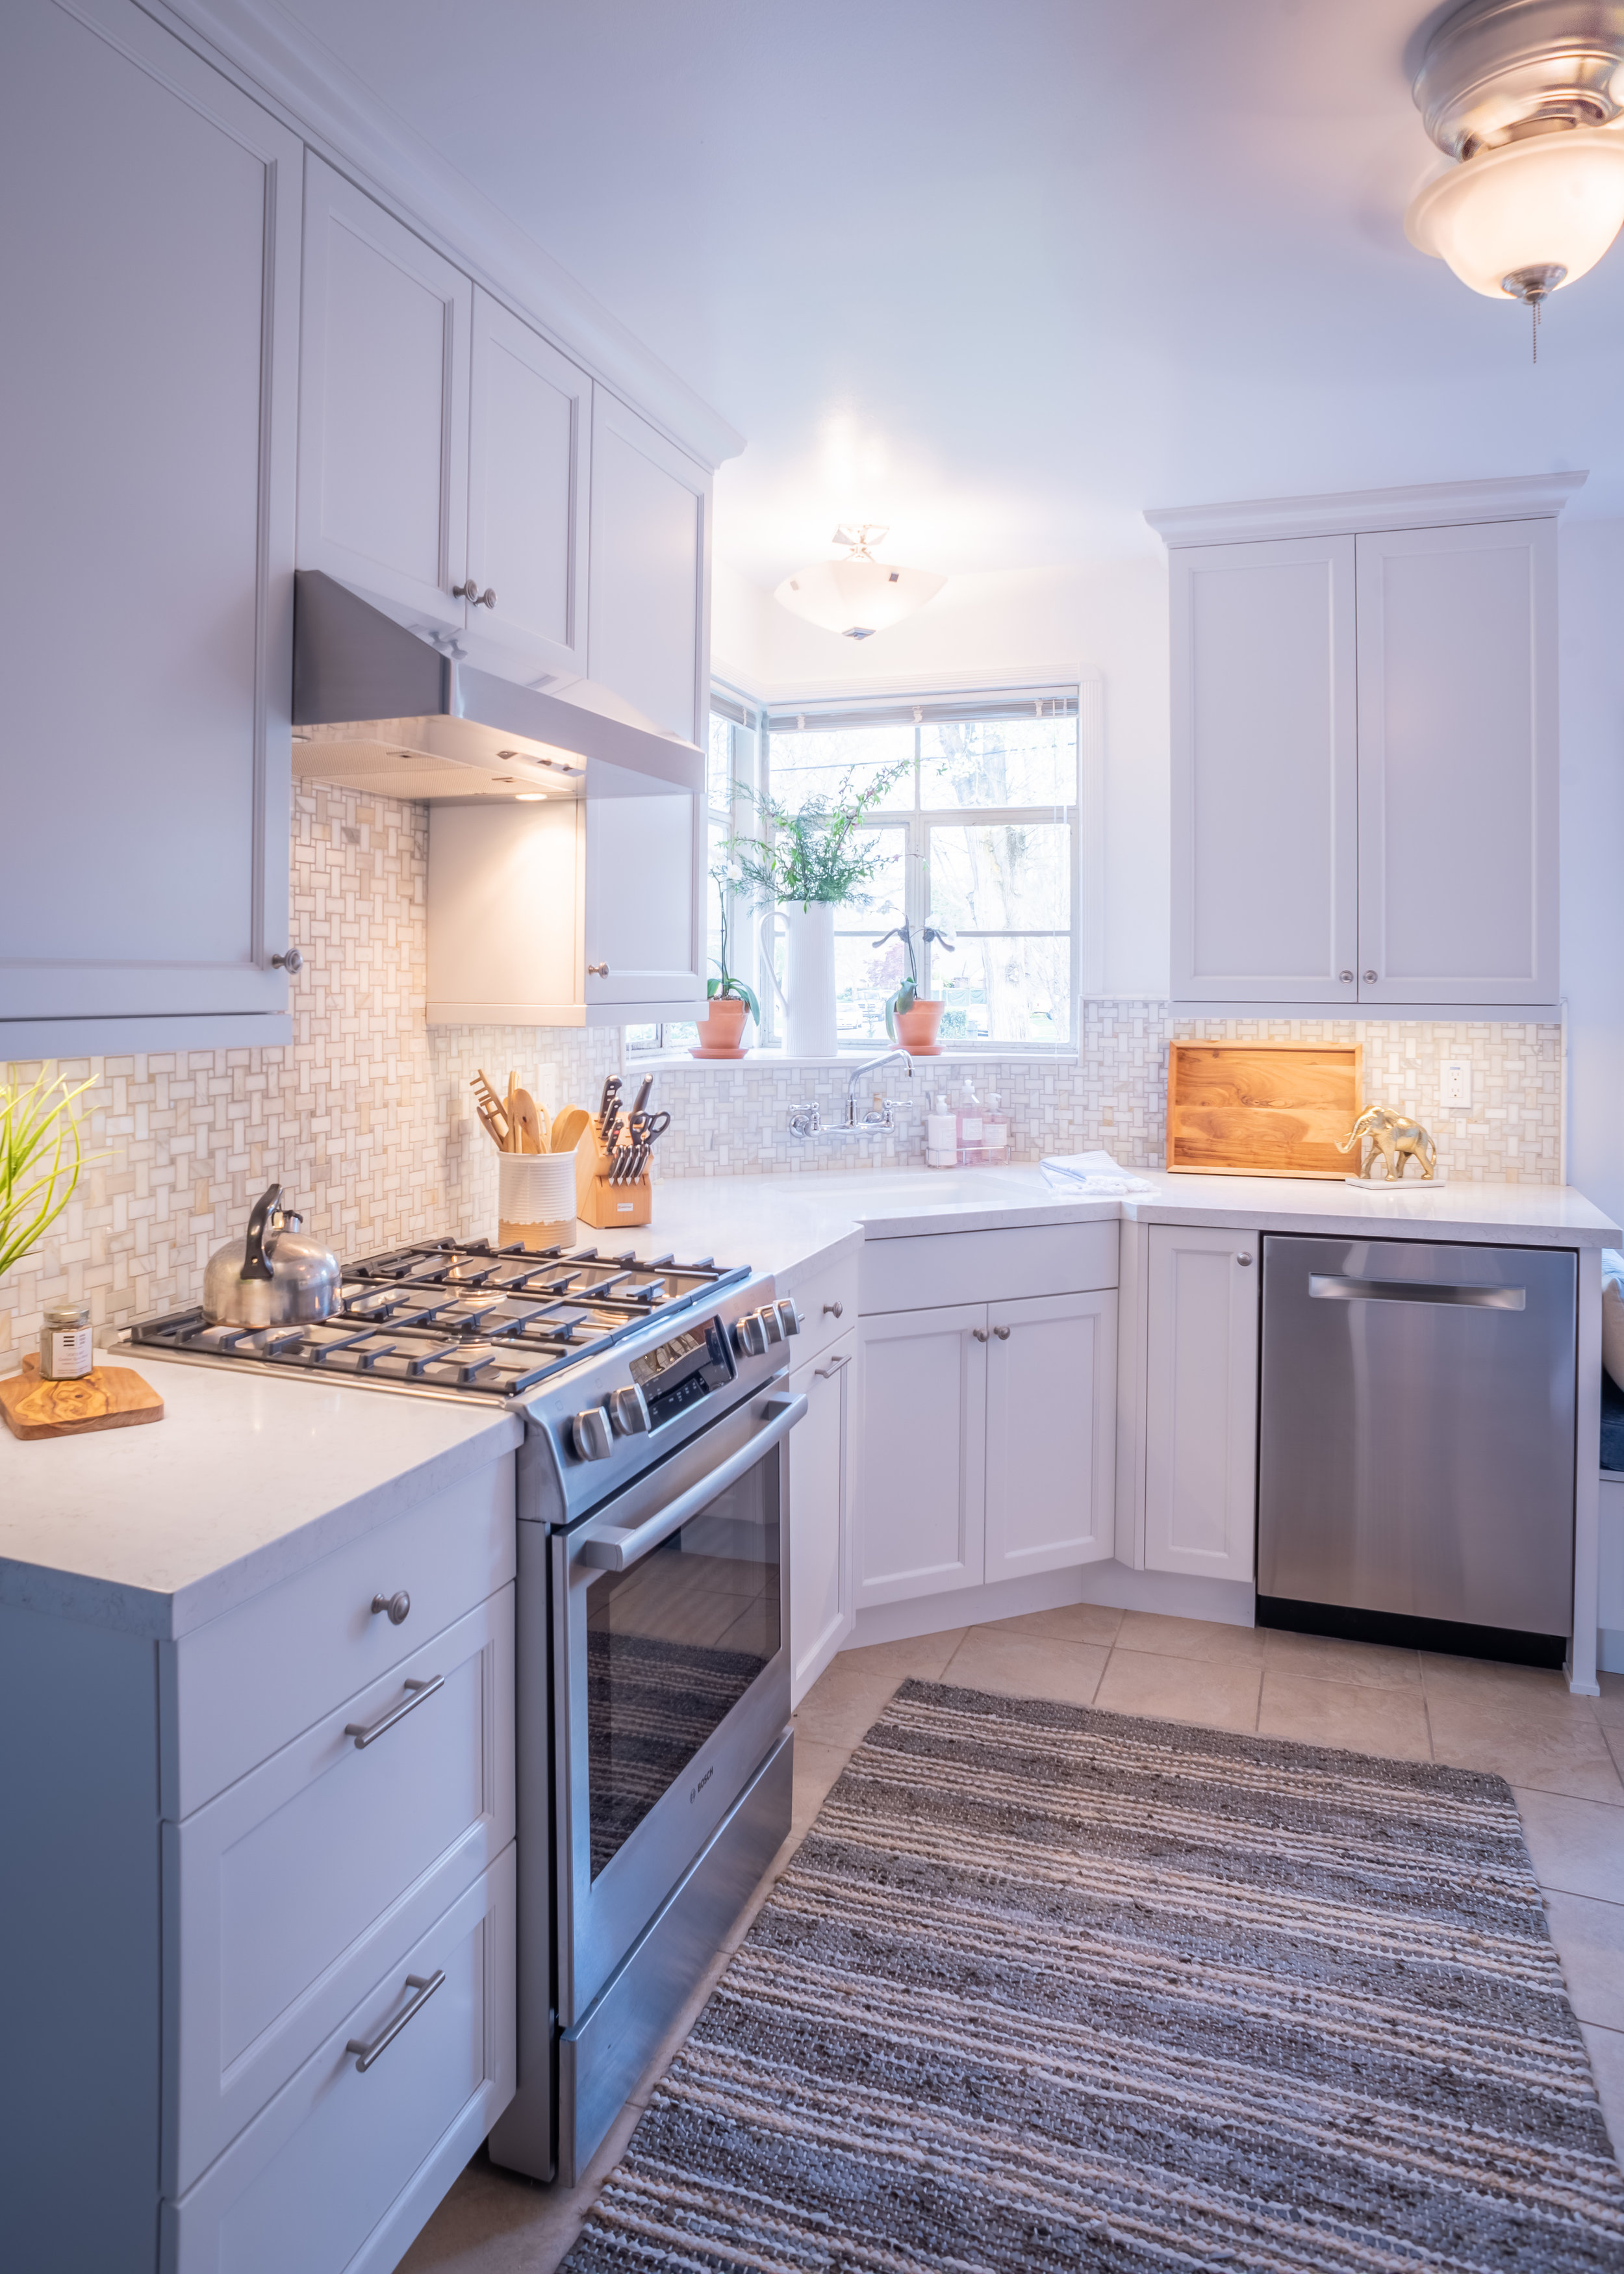
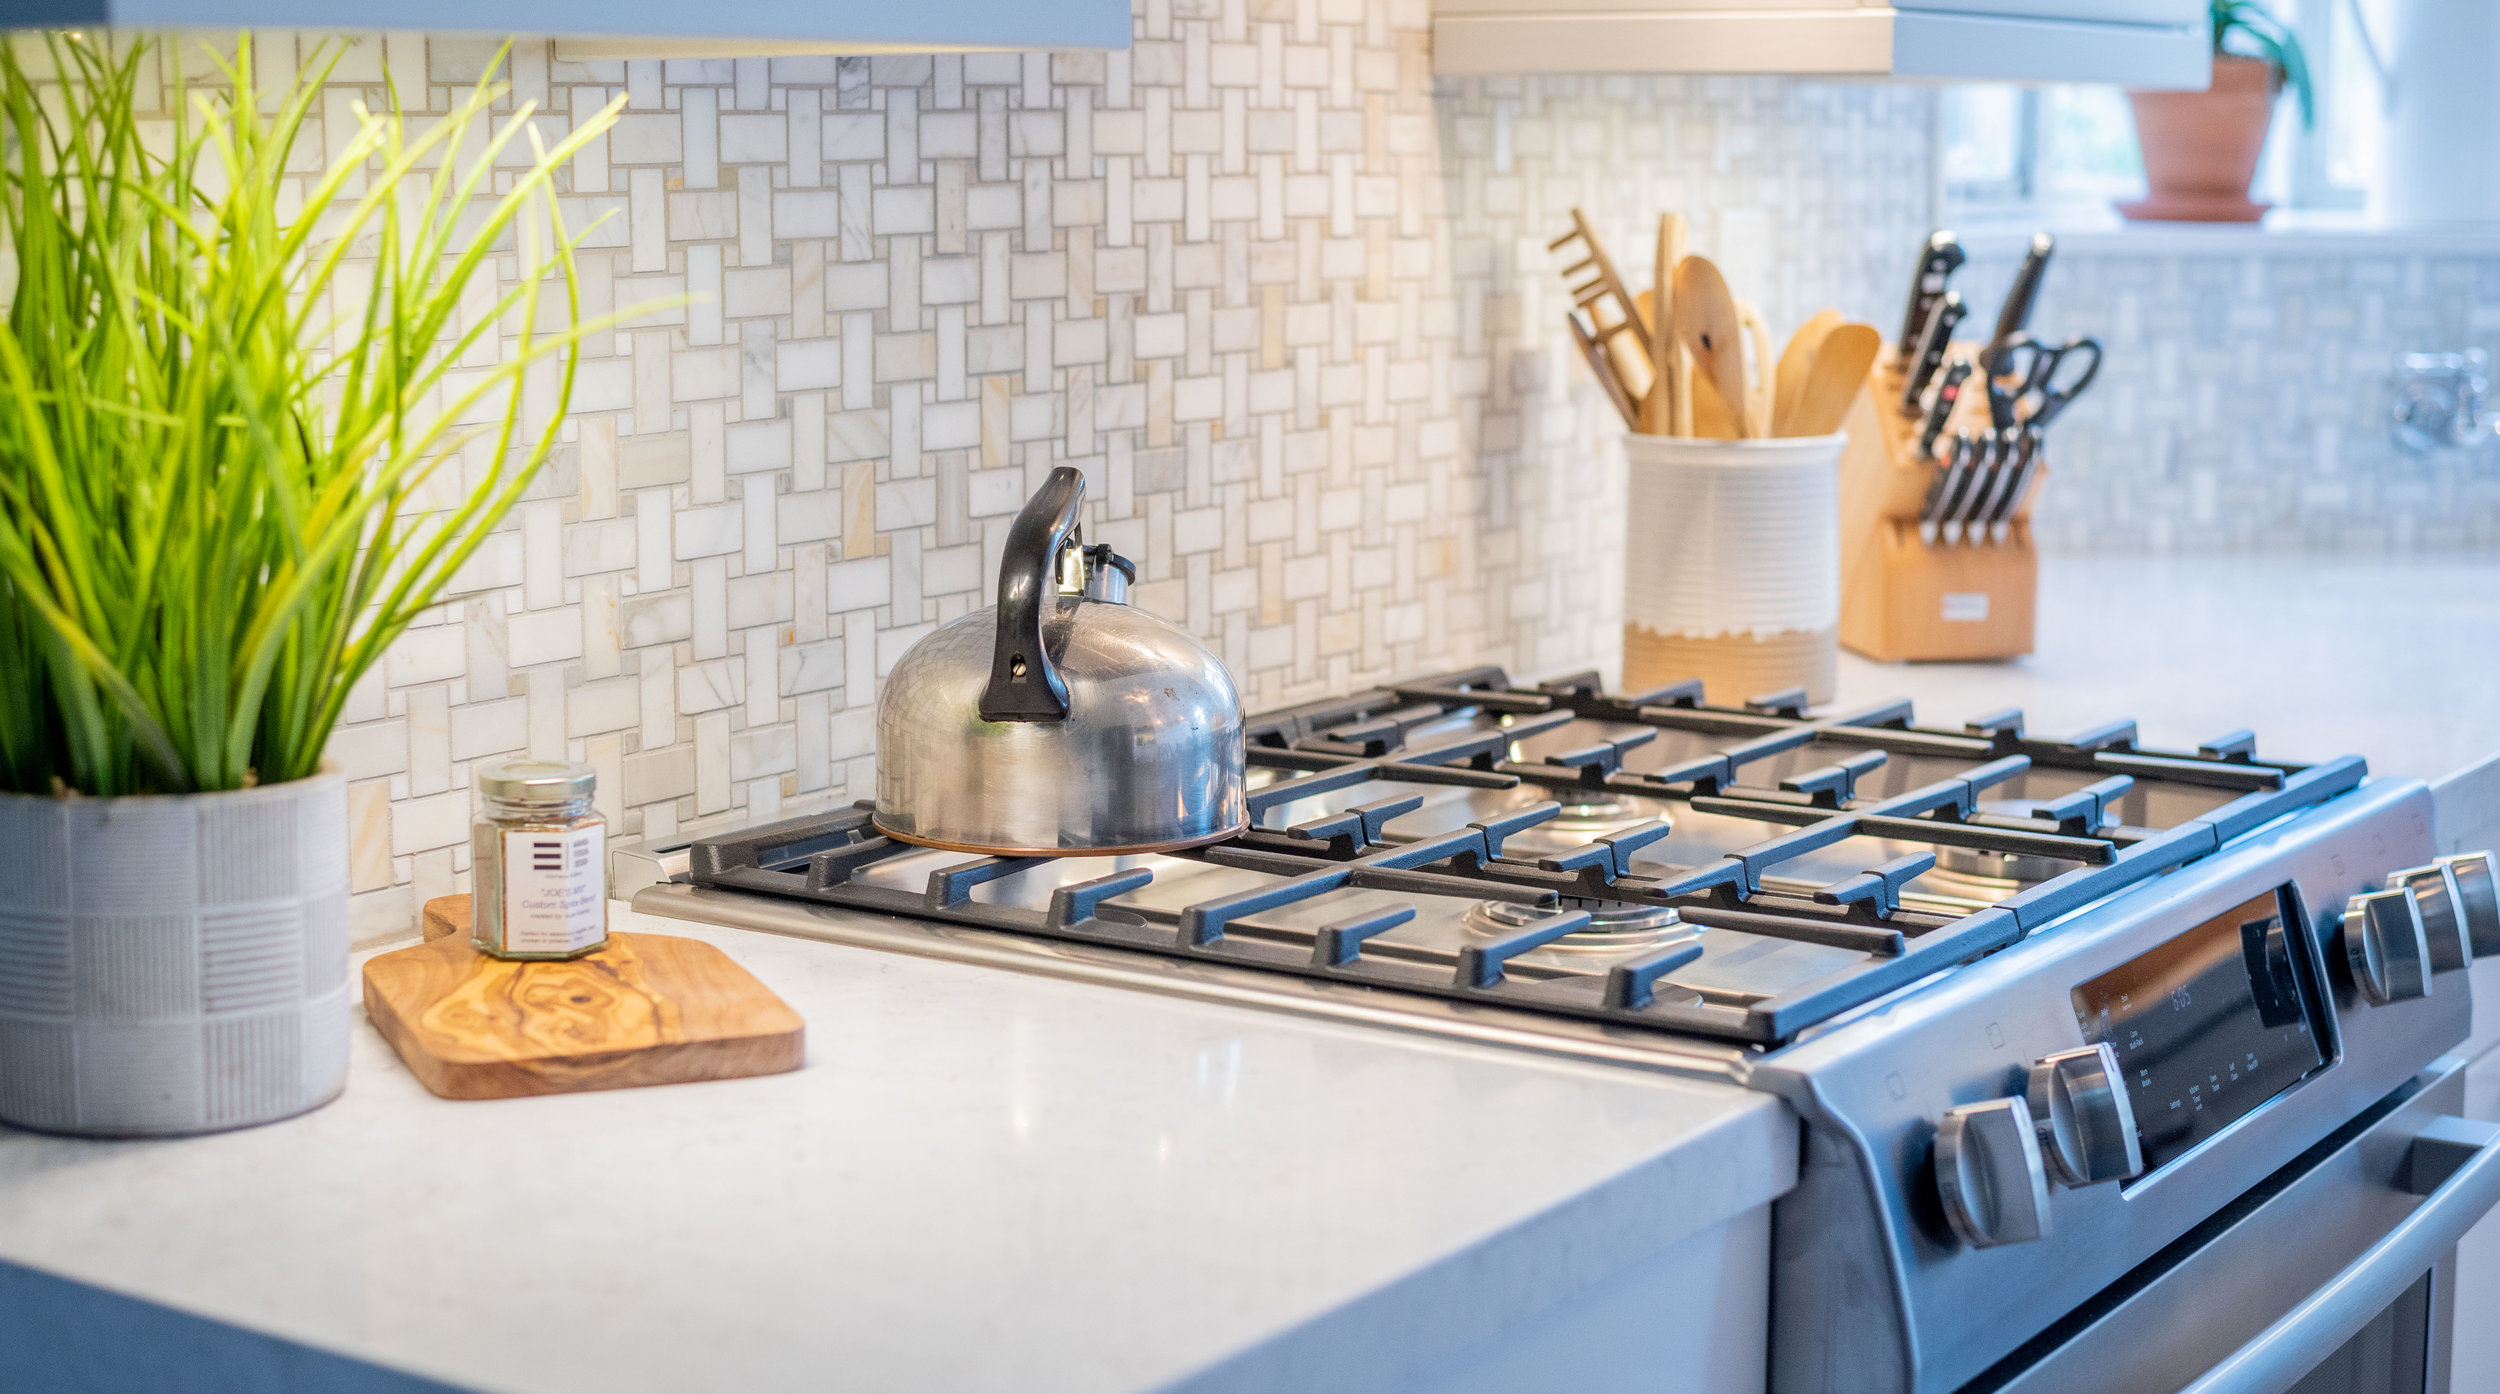
We selected a traditional shaker style door in matte white paint for the cabinets and a white quartz for the countertops. The clients selected a marble mosaic backsplash that give a feel of timeless elegance. The angled sink and wall mounted faucet keep the feel of a vintage kitchen while adding modern appliances and finishes make this little kitchen photo worthy!

So there she is… a sweet little renovation that still feels like a vintage space.

If you are interested in a renovation of your space, give me a call and let’s chat!

~Amanda

916-801-5076

"After" Photos - The struggle is real

I’ve been in this industry for a long time now. I’ve worked at several different design companies that each had their own method of dealing with photographing projects once they were completed. One company didn't photograph jobs at all, one had us use the camera on our phone, one would only have professional photographs taken on one or two projects per year and one had the girl that worked the front desk go to the jobsite with a camera to take photos. None of them consistently had jobs professionally photographed after the job was completed. Those were the “old days” and they are over.

I get it. Professional photography is expensive and time consuming.

After the job is completed you have to schedule the photographer, gather all the items you’ll need to stage the scene, do some cleaning, arrange and re-arrange until it’s just right, spend a few hours with the photographer at the jobsite, clean everything up and then wait for the final photos. And pay for it…

Is it really worth it?

Yes.

In the age of Social Media and Digital Marketing there’s just no better way to show potential clients who you are and what you can do. It’s taken me a long time to come around to this conclusion. I’ve literally had a client tell me I should just charge them an additional amount to cover the cost of photography when the job is completed. You spoke and I listened. (Thanks, Andi.)

So, I’m now going to be having my jobs photographed on the regular.

I’m sure my next step will be to do Instagram stories…but I’m just not there yet.

Travel: Growing as a Designer

In 2 short weeks my husband Joe and I will set out on a 5 week tour throughout Europe. Although each of us have traveled in the past, we haven't been to Europe together.  This will be an epic trip through both familiar and new places on this lovely planet.  

I'll be revisiting some places that I wanted to share with Joe including San Sebastian, Carcassonne, Rome, Venice and Paris (because anyone in love should share that magical city with their partner!) as well as some new places.  I'll finally get to see Barcelona, the Amalfi coast and Amsterdam as well as touring my husbands ancestral roots in Copenhagen, Stockholm and Oslo. 

I'm absolutely overwhelmed. 

I look forward to experiencing life outside of the United States. Hearing the sounds, tasting the food, seeing the beauty (both natural and man-made) and touching the places that were instrumental in the development of civilization. It's never been hard for me to strike up a conversation with a stranger and I look forward to talking with people from around the world.  I crave to understand another perspective. 

As a designer there are so many ways to become inspired and I believe this trip will light a fire in me that I'll be able to share with my clients over the coming year. With the opening of my new showroom and the growth of my business, I am so humbled to also get to have this experience. 

Seeing everything from the opulence of Paris to the simplicity of Scandinavian design, I can assure you I'll be taking copious notes! Through travel we grow, we change, we learn and we find new things that bring us joy. Understanding that we are just a tiny piece in the mosaic of humanity can be liberating. 

We have but one life... live it well. We're all in this together. 

And as Lin-Manuel Miranda so eloquently said...

"....When senseless acts of tragedy remind us

That nothing here is promised, not one day

This show is proof that history remembers

We live through times when hate and fear seem stronger

We rise and fall and light from dying embers,

Remembrances that hope and love last longer.

And love is love is love is love is love is love is love is love, cannot be killed or swept aside.

I sing Vanessa’s symphony, Eliza tells her story.

Now fill the world with music, love, and pride."


Everything About the Kitchen Sink

Let this SINK in...

When you're in the midst of a kitchen remodel you may spend time and money thinking about "everything but the kitchen sink." The truth is, the sink is one of the hardest working parts of every kitchen and deserves a bit of thoughtful consideration to ensure you have a sink that functions perfectly for your needs. 

When I first walk through a client's kitchen there are a few things to which I'm always careful to pay particular attention. The sink is one area that I like to address in my initial consultation because it gets clients thinking about function and convenience rather than just focusing on style. There are a few basic choices that can help you narrow down your options and ensure you end up with the right sink for your home.

Drop in or Under mount

A Drop in sink will be a good solution if you aren't replacing the existing countertop as you may be able to select a slightly larger sink than you currently have and there won't be any gaps to fill in the countertop.  If you select this option there are a few things to note. You'll have a silicone seam around the raised perimeter of the sink which will make wiping off the countertops a bit more difficult.  You'll also want to make sure that any new sink you select will fit fully within the base cabinet if you replace an existing sink with a larger new one.  I try to avoid using drop in sinks if at all possible. *The exception is a vessel sink in a powder room or guest bathroom.

Most sinks that are installed in kitchens with new countertops are under mount.  This means that the countertop is installed OVER the perimeter of the sink and there is no "lip" to impede wiping the counters.  The sink should be on the jobsite before the countertop fabricator comes out to make the template for new tops.  Some fabricators will even take the sink with them to cut the hole in their shop. Typically when installing an under mount sink you can also have the faucet, air gap, soap dispenser and push button switch for the disposal come right through the countertop for a sleek and clean design.

One or Two Basins

This decision really comes down to personal preference.  Most people don't even think about what it would be like to have a sink that is any different than what they're used to. You may love the configuration you currently have...but could it be improved?

One basin allows for a smaller sink base cabinet that will allow the other base cabinets to be a bit larger for storage of other kitchen items. This also gives you more counter space.  If you have a small kitchen I highly recommend a single basin. Typically the drain is in the center of the sink although there are some that have an off-centered drain which makes storage under the sink more functional. One of the perks of a single sink is that large pots and pans are able to comfortable lay flat on the bottom of the sink.  For soaking those filthy 9x13 pans this can really come in handy! The disposal will be attached to the single drain so if you like to have a sink full of soapy water, you won't be able to use the disposal.

Two basin sinks come in all configurations with either equal or unequal sized basins. If you like to have one side filled with water to soak dishes but still want access to a disposal, I recommend the two basin unequal sink.  This means one side is 2/3 of the total sink width and would be used for soaking and the smaller 1/3 side is typically more shallow and would have the disposal. 

Traditional of Farm Sink

TREND ALERT!!!! Everyone who watches HGTV wants the Farm Sink style that Fixer Upper has brought to the forefront as the overwhelming current design trend. There's nothing wrong with being trendy as long as it's really what you want.

Farm sinks are pulled forward in the base cabinet so that they actually protrude in front of the cabinetry.  Functionally they are very pleasant to stand at and wash dishes as you don't have to bend forward very far to have your hands in the sink. If you're installing new cabinetry there are specifically designed base cabinets that have a support platform inside the cabinet and a blank flat panel in the front so that the installer can cut the hole for the sink and still have fully functional doors under the sink.  If you're retrofitting existing cabinetry you may have to have new doors made for your sink cabinet as well as a platform built inside the cabinet to hold the weight of the sink so that it doesn't collapse into the cabinet when it's full of water! One thing to beware of is that some sink materials are prone to being scratched and damaged by belt buckles or the buttons on your jeans as you lean forward onto the front of the sink.  I've been in a few kitchens that have a wear mark on the front of their beautiful farm sink!

Traditional sinks are a few inches from the front edge of the countertop and are installed either as a drop in or an under mount sink. The cabinetry will be full height at the sink area and there is either a false panel or a flip down sponge tray in front of the sink.

Stainless, Cast Iron, Fireclay or Composite Material

Here's where it gets a bit more complicated.  I highly recommend visiting your local plumbing showroom so you can see and feel each of these options in person to make the best decision for your family.  Stainless comes in several gauges that will effect their durability as well as the sound that is produced when water hits the bottom of the sink. Cast iron is a classic that comes in a wide variety of colors to accent almost any design and is among the most durable sink materials.  Fireclay has a lovely vintage look and cleans up nicely although it can be prone to cracking. Composite sinks are the new kids on the block and are a nice balance between function and style.  There aren't as many color options as Cast Iron but they are incredibly durable and have a texture that can't be found in any other product.

For each of these types of materials there are a wide range of quality and price points depending on the manufacturer.  If you're shopping on line just remember...If it sounds too good to be true, it probably is.  You can expect to spend anywhere from $450 to $1,200 on a good quality kitchen sink. Don't even get me started on faucets!!!! We'll save that for another post.


Radiant Heat Floors - They're so hot right now

What comes to mind when you hear the word "luxury?" Perhaps you think of a private plane, expensive cars or huge homes in exotic locations? When I think of luxury I tend to focus on the experience rather than the item itself.  Sometimes you can have a wonderfully luxurious experience with a super soft bath towel or while enjoying a delicious meal.

Luxury doesn't have to be super expensive. 

If there was one luxury upgrade I could recommend it would be radiant heat flooring.  The experience of waking up on a chilly morning and stepping out of bed onto a gently warmed floor can be a little touch of heaven. For clients who are planning a bathroom or kitchen renovation, it's an easy way to overcome the biggest negative of using tile on the floor. No one likes to step onto a freezing cold floor!

Whether you have pets that sleep on the floor, kids that play on the floor or are just looking to make your home a more comfortable oasis, radiant heat flooring can be the touch of luxury you're looking for.  It is an additional expense but the return on investment will pay off with reduced heating bills and the comfort of walking on a surface that hugs your feet with cozy warmth when you need it most.

Heat can be installed under many (but not all) types of flooring. The most common form of radiant heat is using low voltage electricity in a thin mesh that is installed between your sub floor or slab and your finished floor covering. If you want to have every inch of your flooring heated, there are custom mats that can be made to fit the exact dimensions of your space. If you only need specific pathways or locations heated, there are also a variety of standard size mats that can be combined to cover the necessary locations.  Most of these mats can be used under engineered wood, tile, laminate and even vinyl plank floors. *Be sure to check with the flooring manufacturer to see if their warranty will allow them to be installed over radiant heat.


One of my favorite methods of heating tile floors combine the heat element with an anti-fracture membrane that help keep the surface tile from cracking if your subfloor moves or cracks. Not only can you fully customize the locations of the heating element, but the quality of the tile installation will be improved! This method is particularly helpful if your home is on a slab foundation. Temperature is controlled by a thermostat that can be set and adjusted to ensure optimal energy efficiency and comfort. You'll find that the more you use the radiant heat, the less you'll use your old forced air heater!

Pricing can range quite a bit so I recommend getting a quote from your local flooring installer.

Check out Warmly Yours and Schluter DITRA HEAT for more information and to find a local installer.